
✽ For Wall Clocks Produced by Vitra
This is a courtesy guide for replacing the movement and/or hands on Vitra produced George Nelson WALL CLOCKS (desk clocks behind plexiglas require additional skills, please contact us.). If this is not a task you can perform or your time is too valuable to spend 15-60 minutes (depending on your mechanical inclination), it is a simple job for any reputable local clock repair shop or handyman. Please DO NOT call us to help remotely, if you find something that is not covered in our guide please email photos. View information for replacement movements
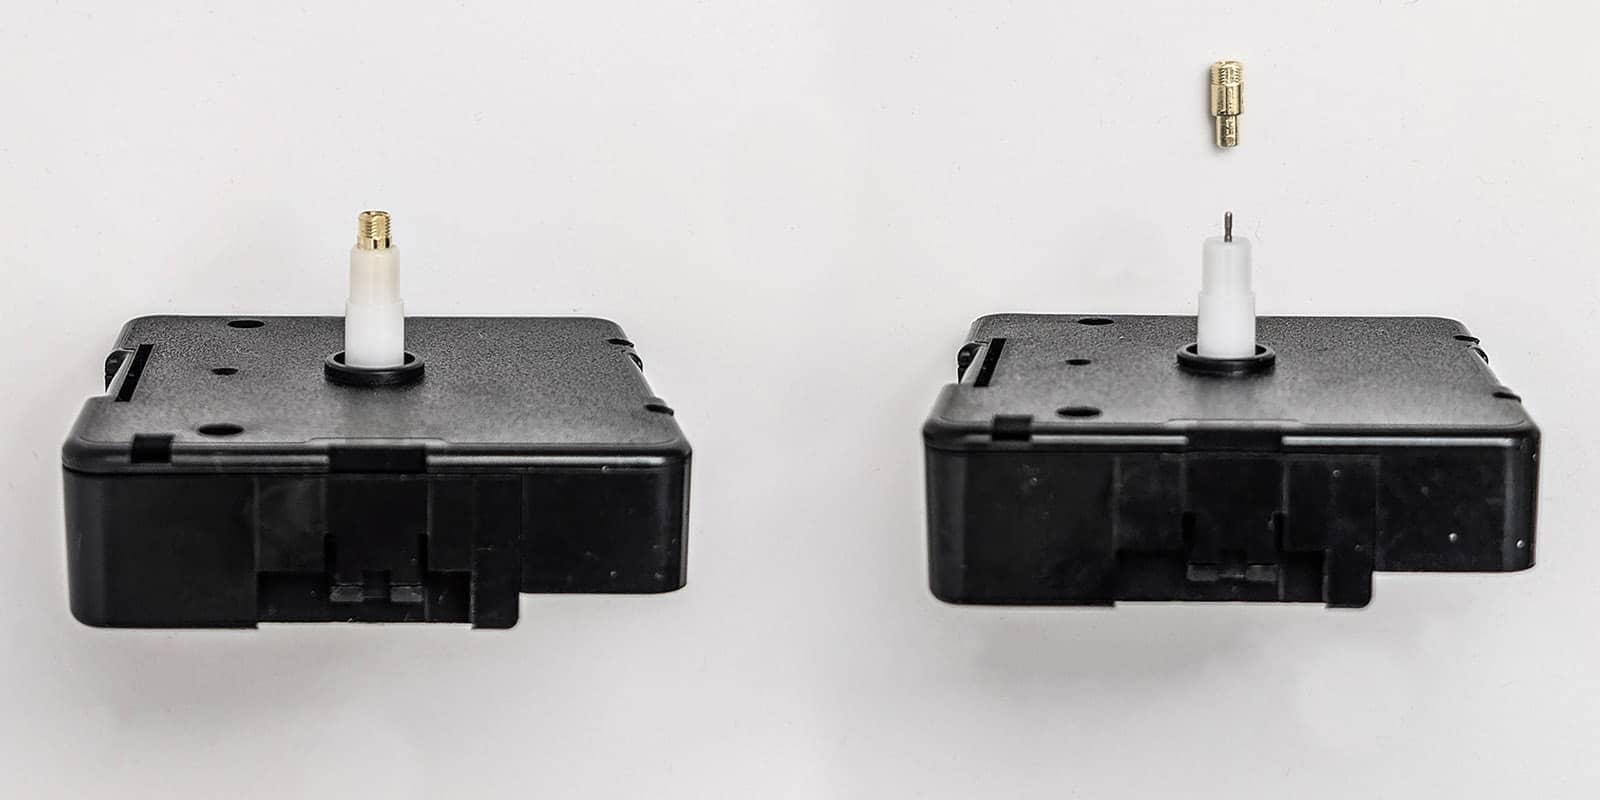
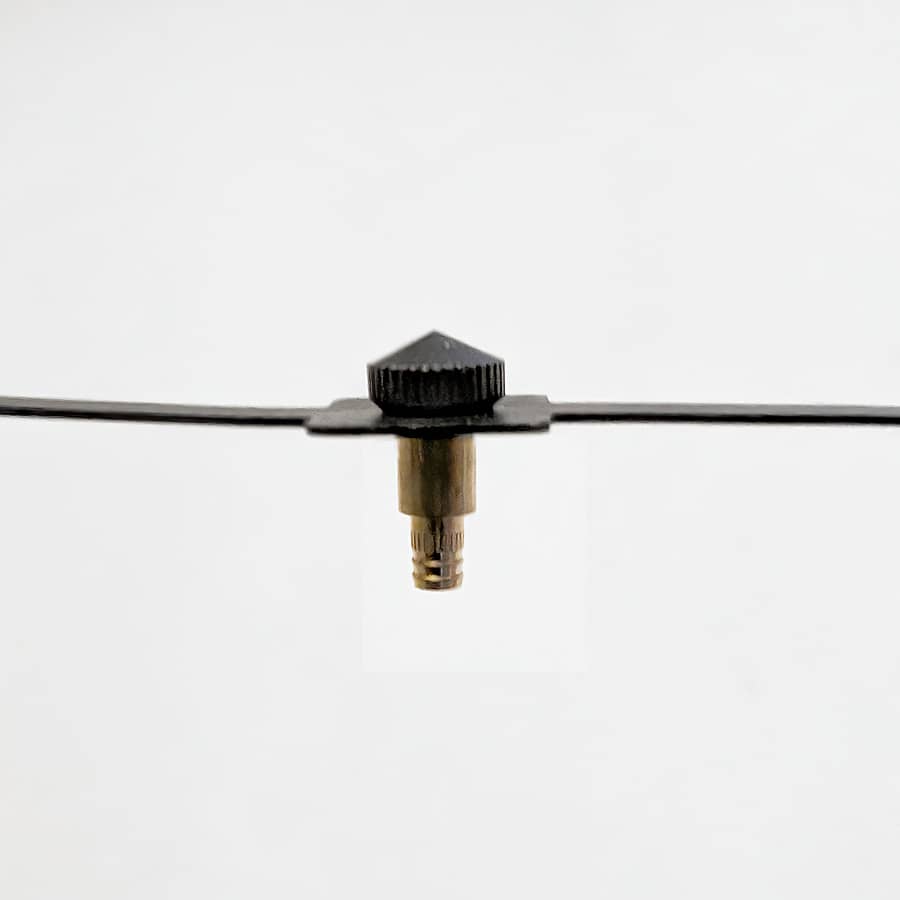
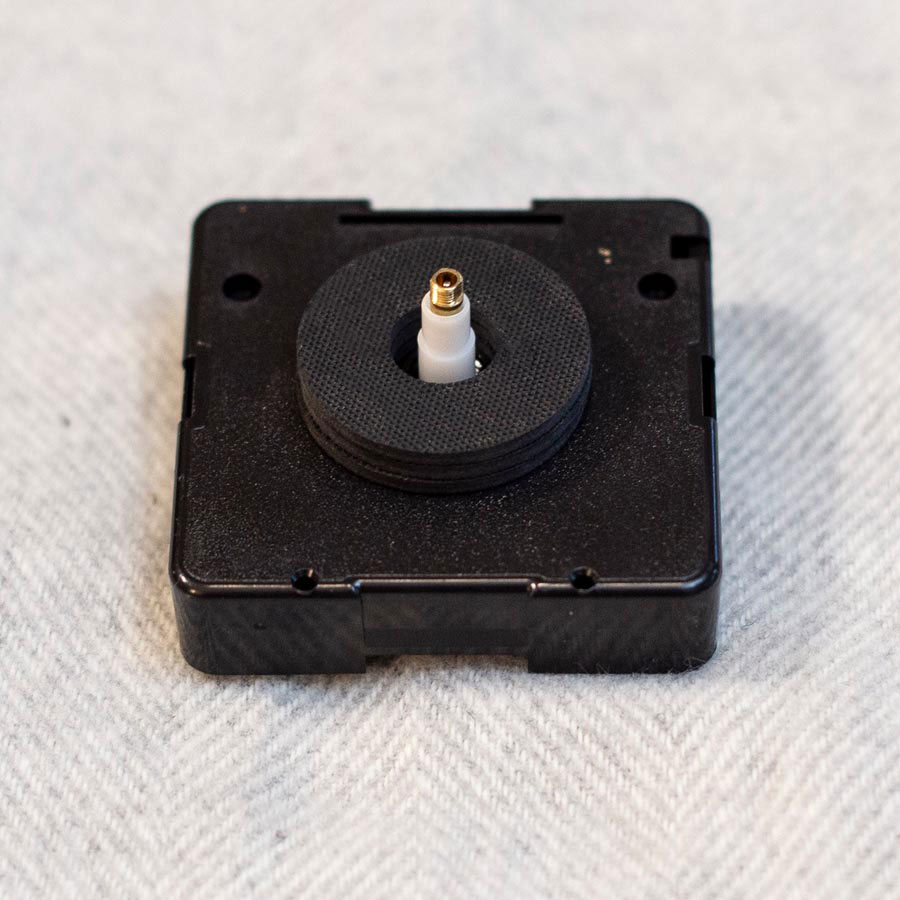
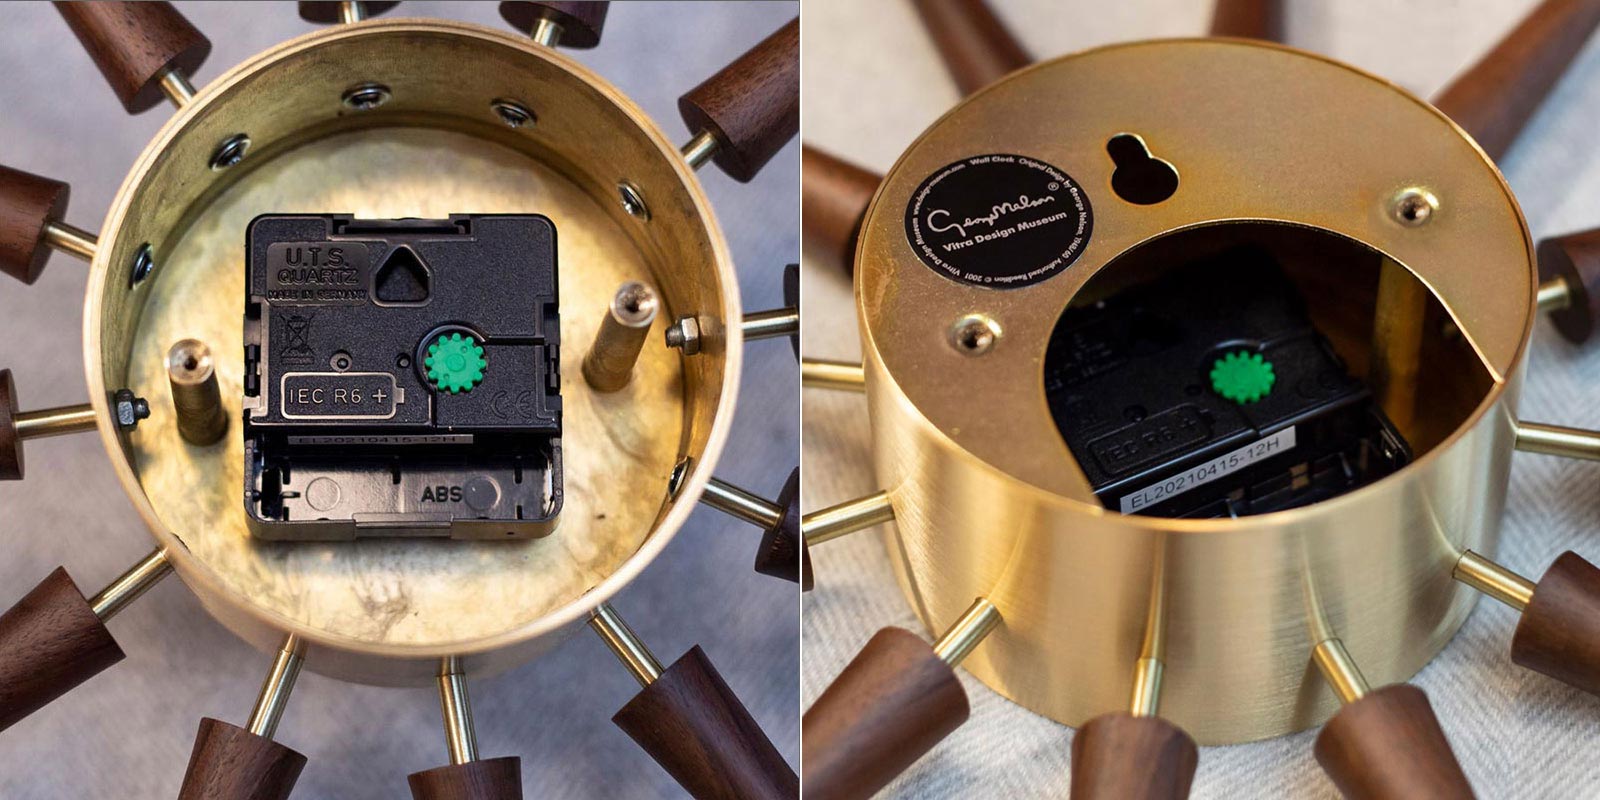
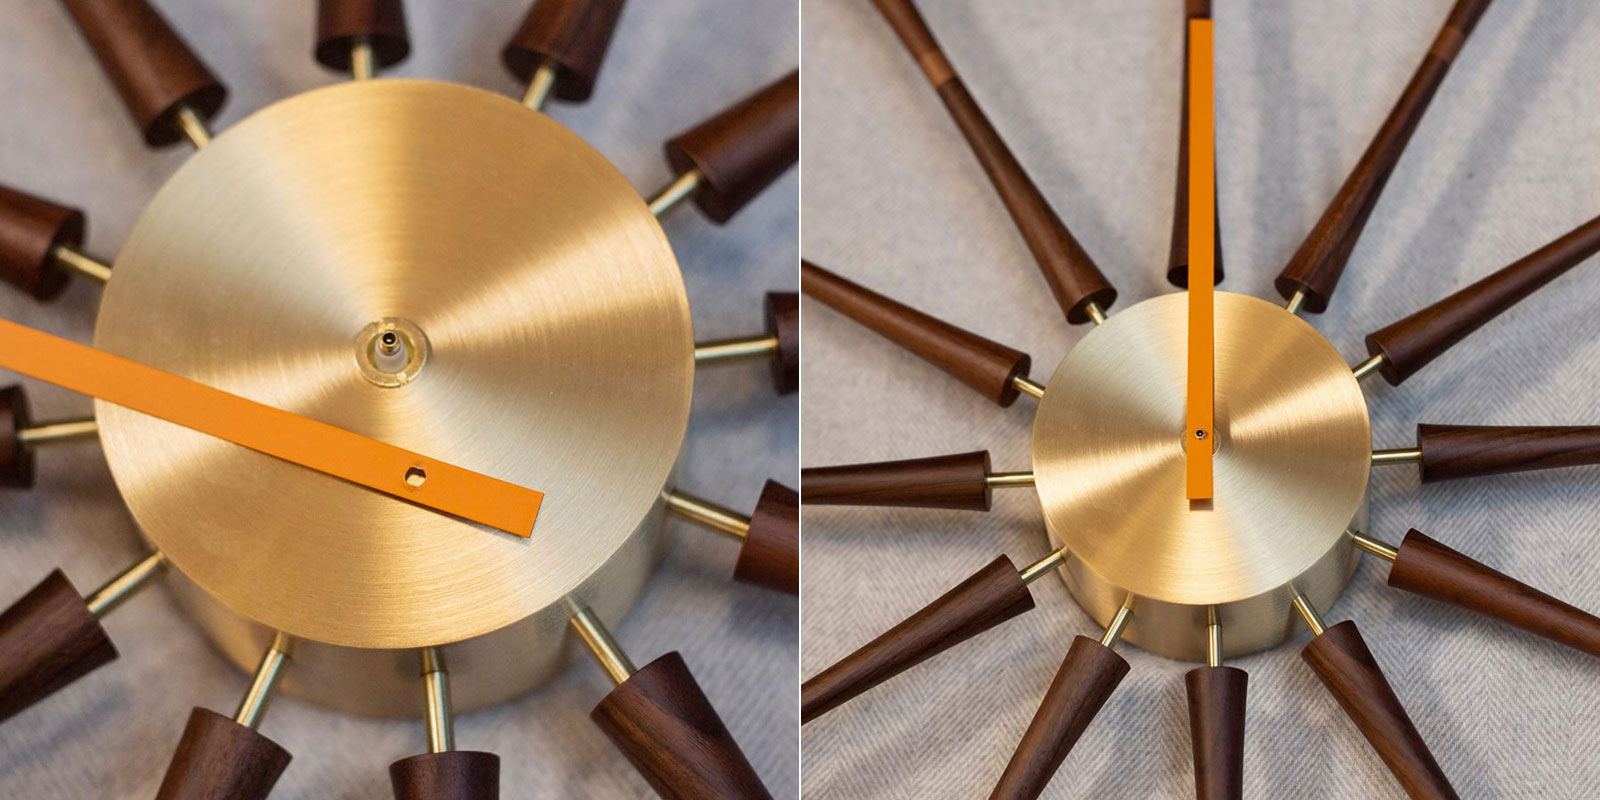
YES, THESE ARE THE SAME MOVEMENT. If your movement looks like the one on the right, it is missing the metal shaft shown. This part is either stuck in your minute hand (see STEP 4) or missing. The minute hand on Vitra clocks is ALWAYS a flat sheet of metal. If your movement is working, but this part is missing, you can purchase this part only.
IMPORTANT! Use caution, you can damage irreplaceable body parts of your clock. Work on a soft surface that will not scratch or damage your clock. Read and pay close attention to each step when disassembling because you will be re-assembling. ALL Vitra produced clocks use the same German quartz movement that we ship. It is the same (and only ) movement that Vitra sells. A few models use a special longer minute hand shaft (Polygon, Wheel and Fan Clocks) that you must remove and reuse from your old movement.


STEP 1 Before any repair work, always remove the battery to stop your clock. It is easiest to press the battery in towards the spring / negative end and pull the positive end up at the angle shown.


STEP 2 For clocks with a second hand, pry off the second hand by grabbing the middle and lifting directly upward. It can be helpful using fingernails to get beneath it.
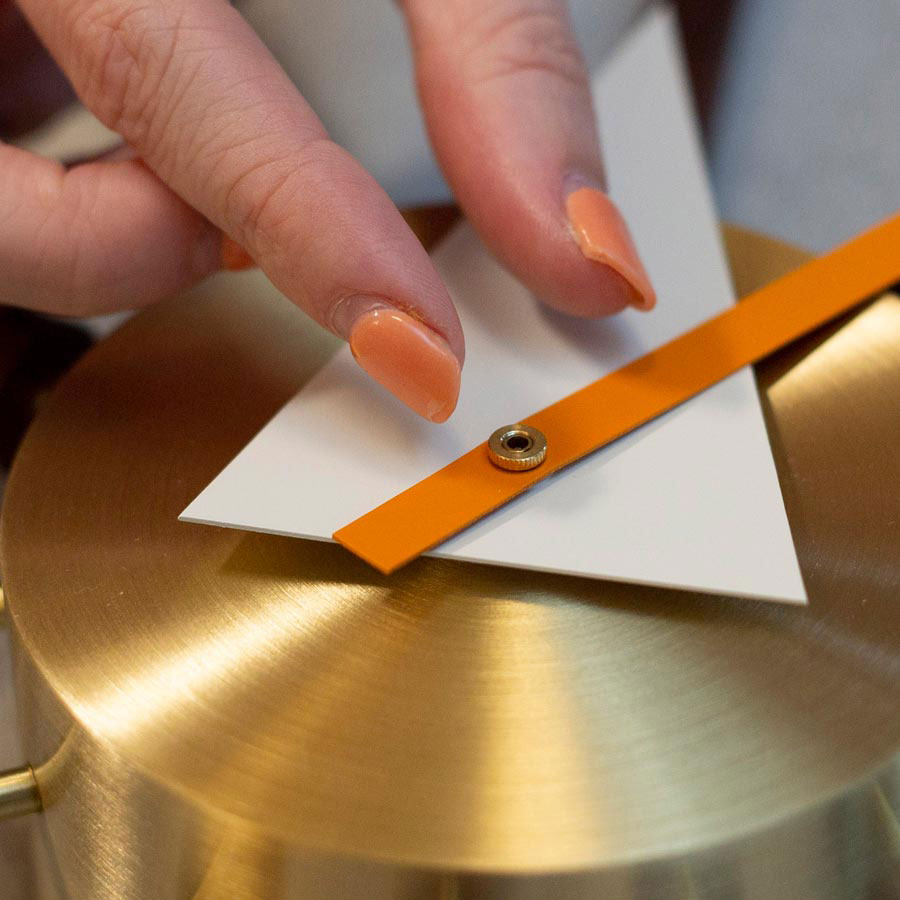

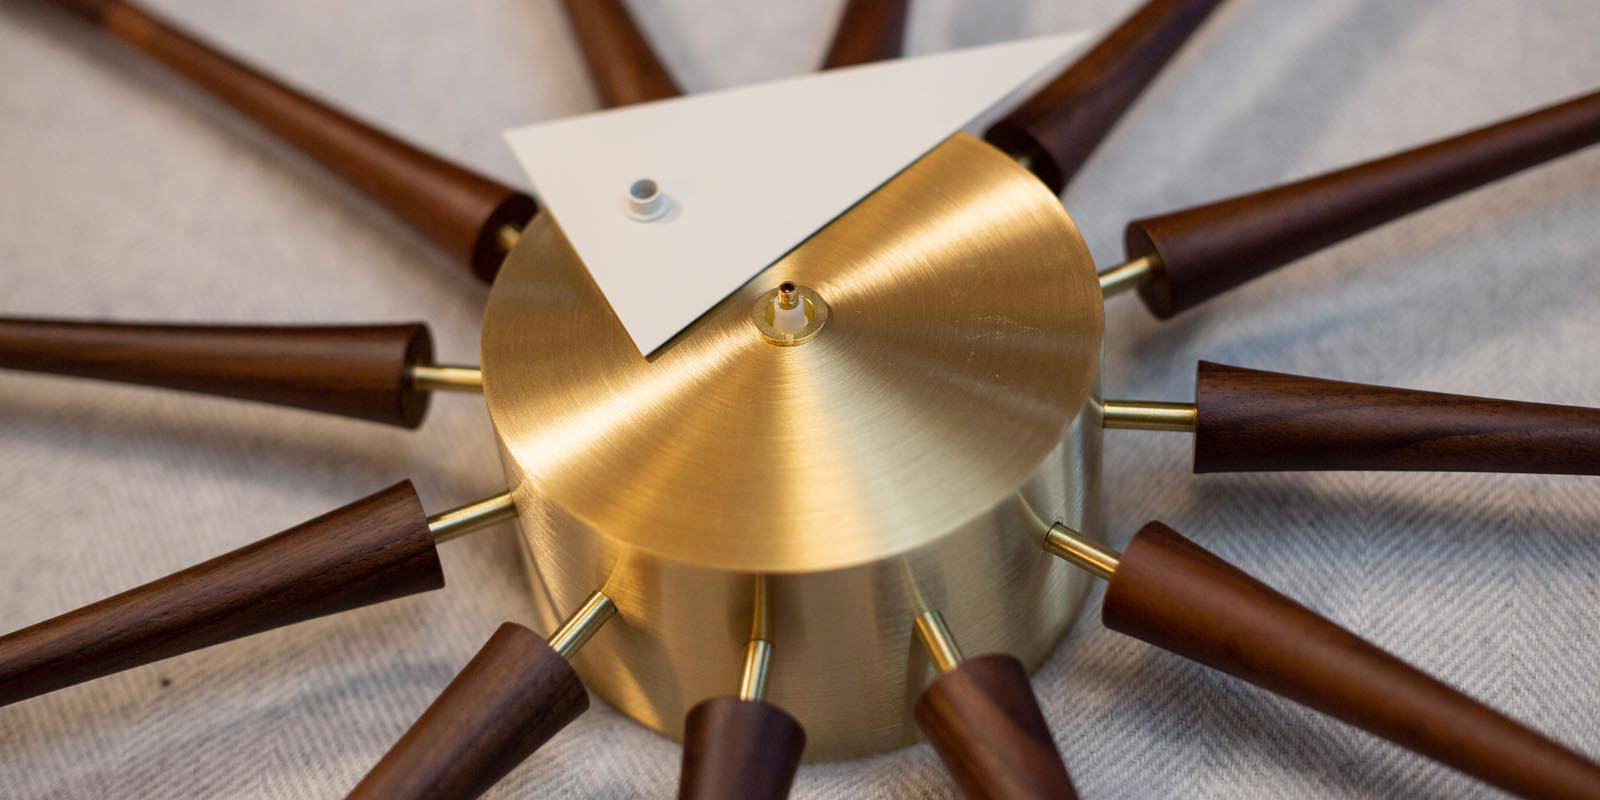
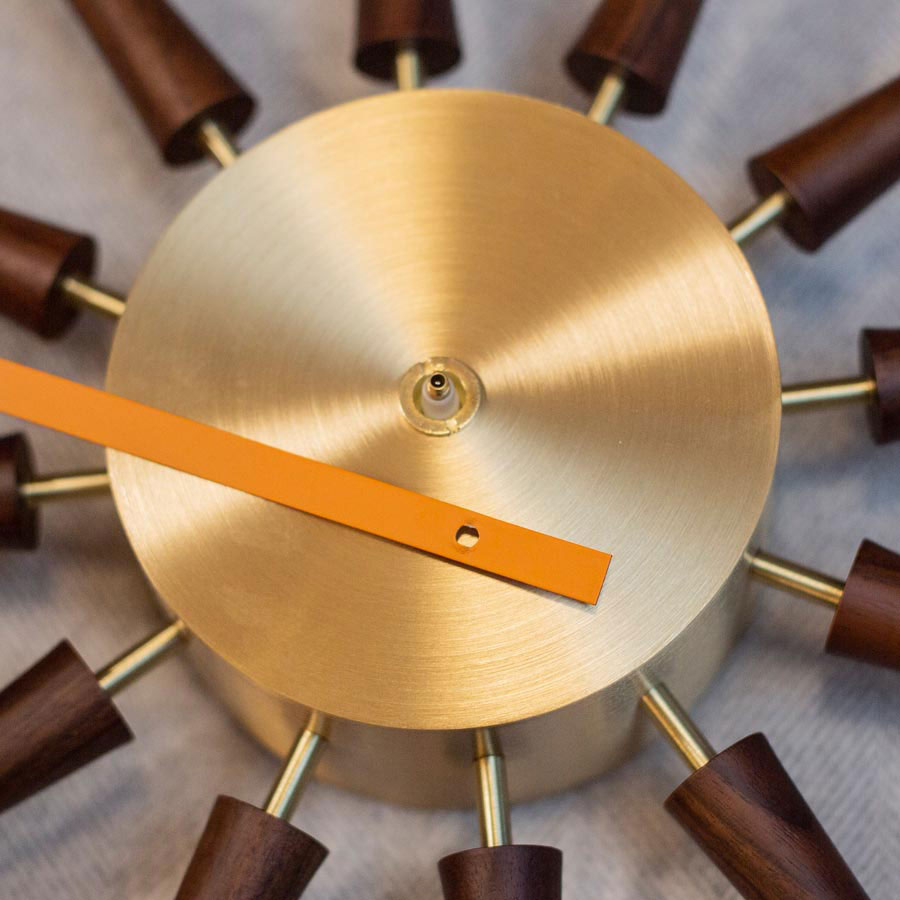
STEP 3 Unscrew the nut that holds the minute hand in place. It unscrews counterclockwise. On clocks without a second hand, there is a closed nut that holds your minute hand in place. NOTE: If the minute hand fell off or is loose, the nut may have come undone.
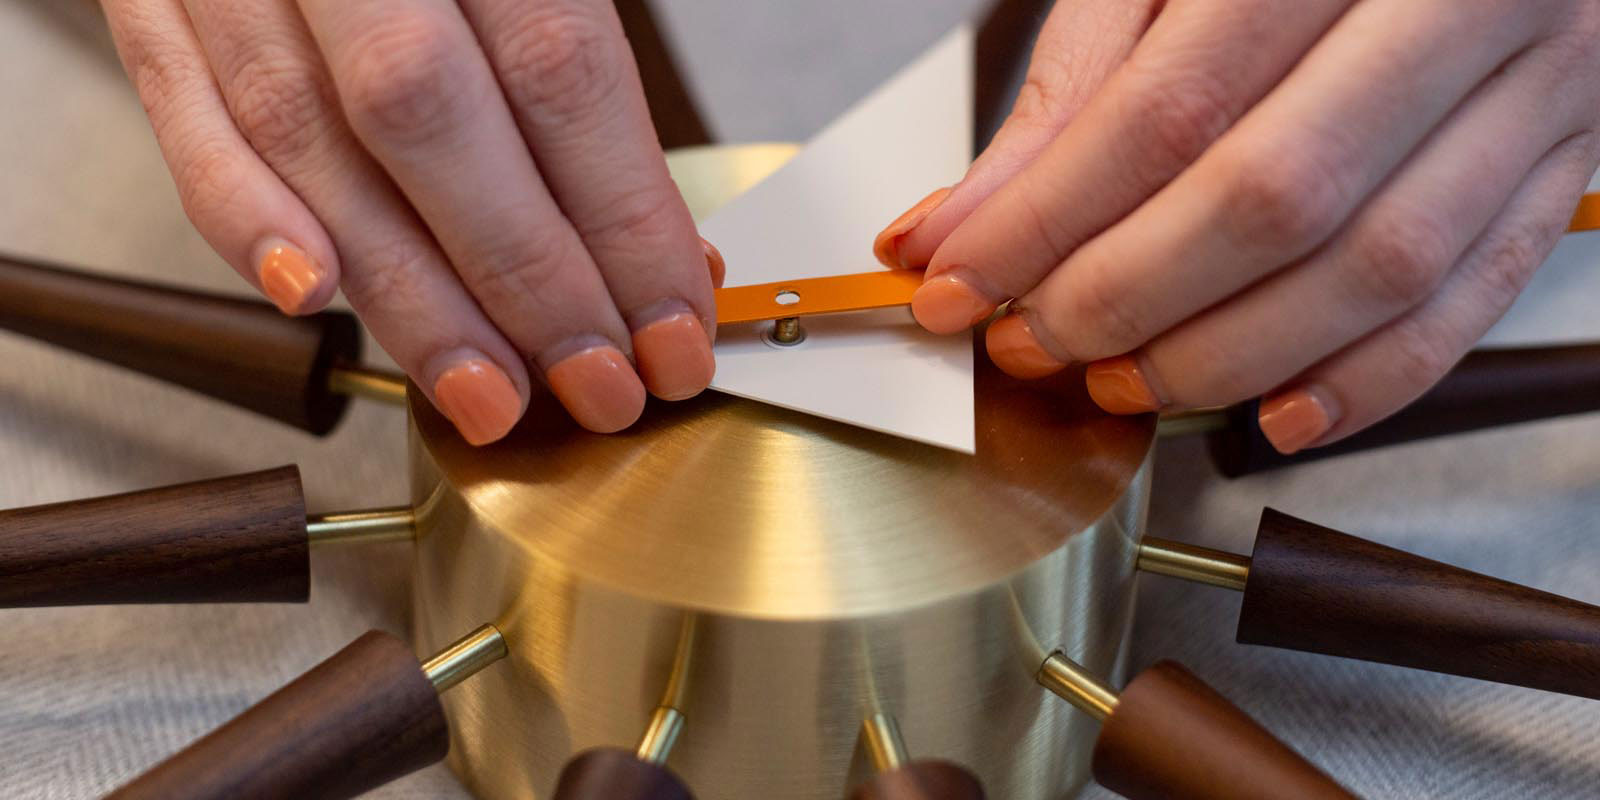
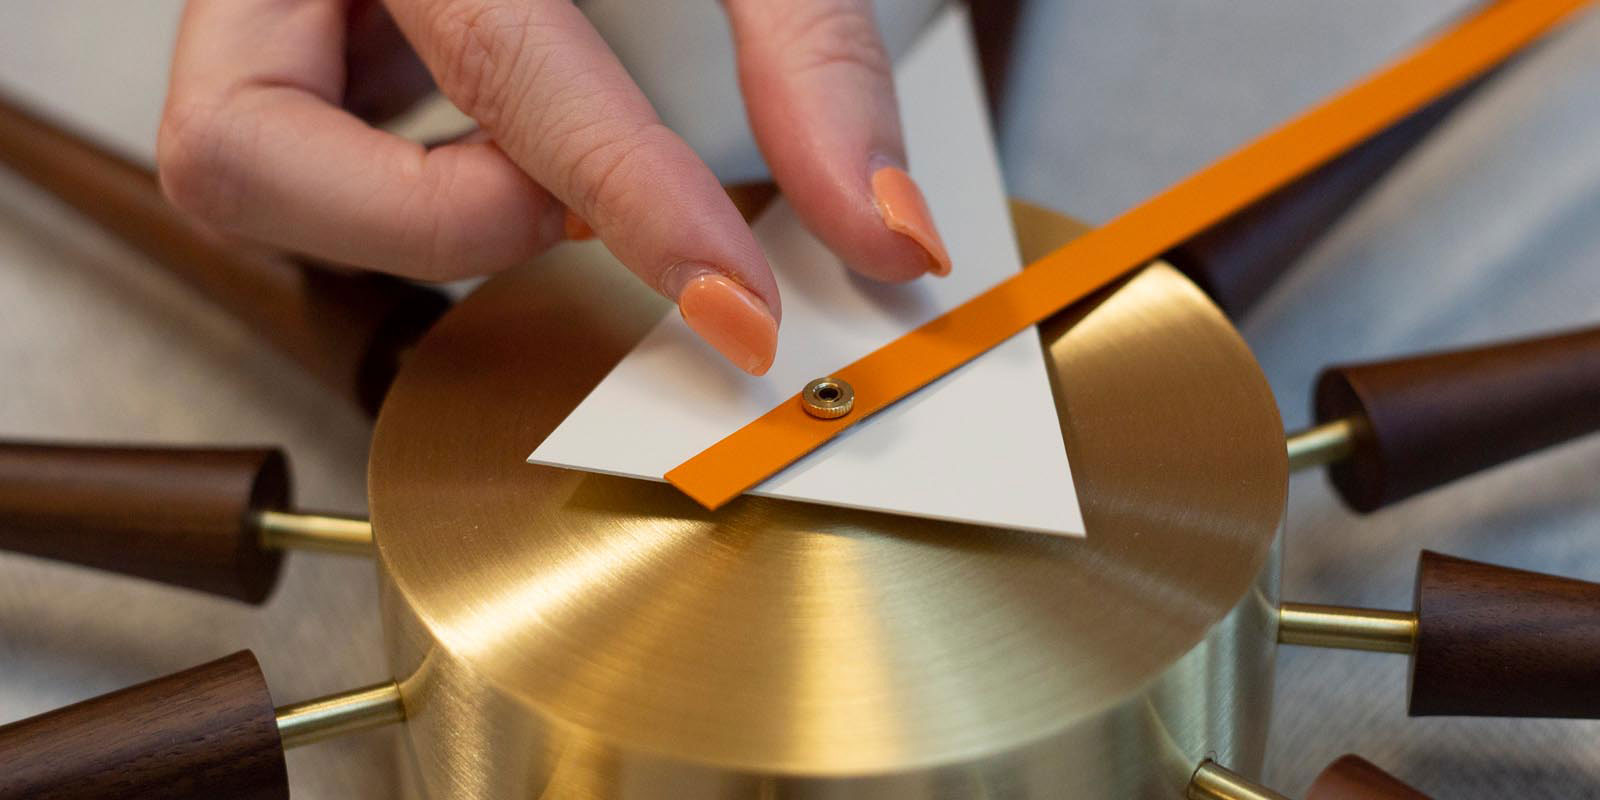
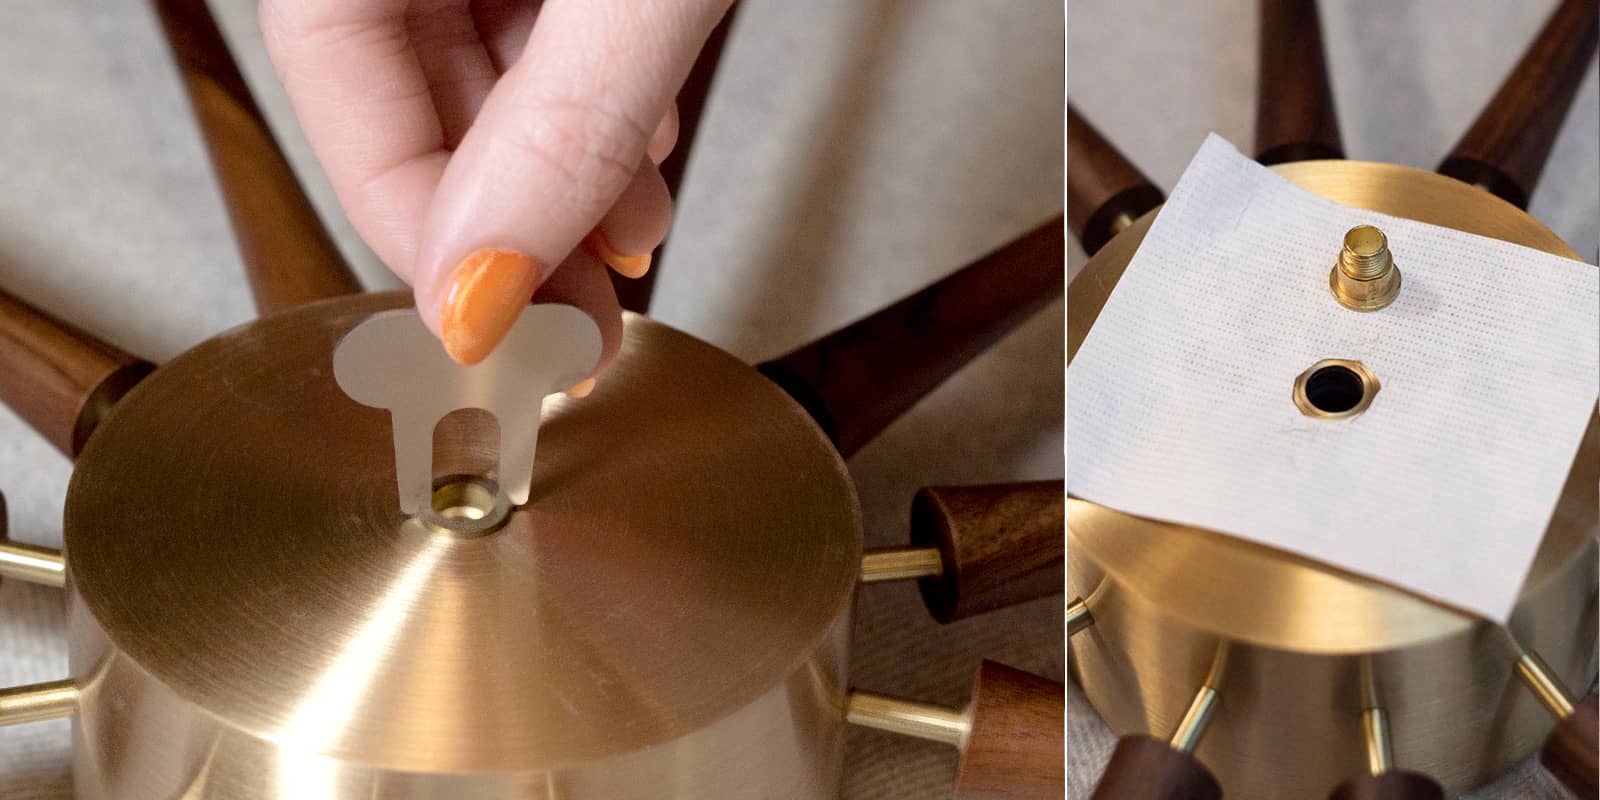
STEP 4 Lift the minute hand off by grabbing it near the shaft and pull upward. You may need to wiggle it gently side to side. It should come off easily. All minute hands attach the same way. Notice that the minute hand hole has two parallel sides and slides on the shaft in one position only.
IMPORTANT: If you see something stuck inside the minute hand as shown above, it is part of the old movement and the closed nut holding it in place. The minute hand is ALWAYS a flat sheet of metal on Vitra produced clocks. Compare the old movement to the new one and you will see a metal tip on the new one that is absent on your old movement. This is what is stuck in your minute hand; it's not because we sent the wrong movement. In most cases, once you loosen the closed nut, the metal cylinder will pop out. If it does not, with the bottom of the minute hand facing down, press firmly against a scratch resistant surface to pop out the metal cylinder or use pliers to dislodge.

STEP 5 Pry the hour hand off by grabbing it near the center and pull upward. You may need to wiggle it gently side to side. It will require more force than the minute hand. Note the design of the removed hour hand in the photo. All hour hands insert into the movement the same way.
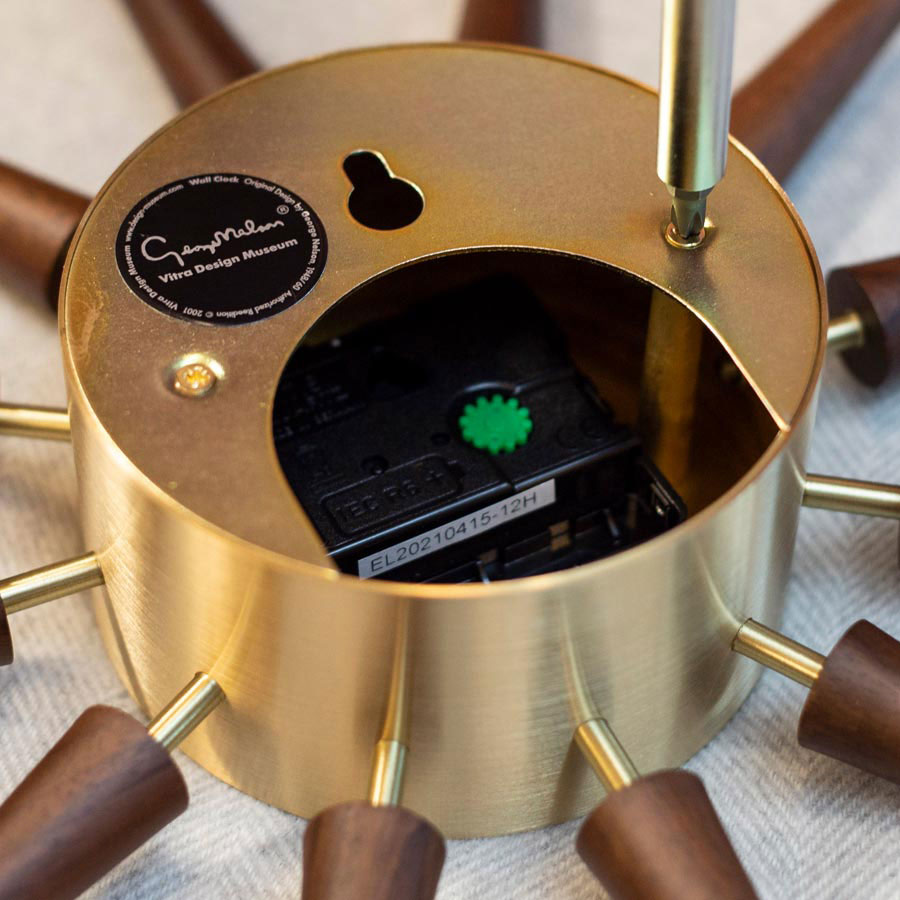


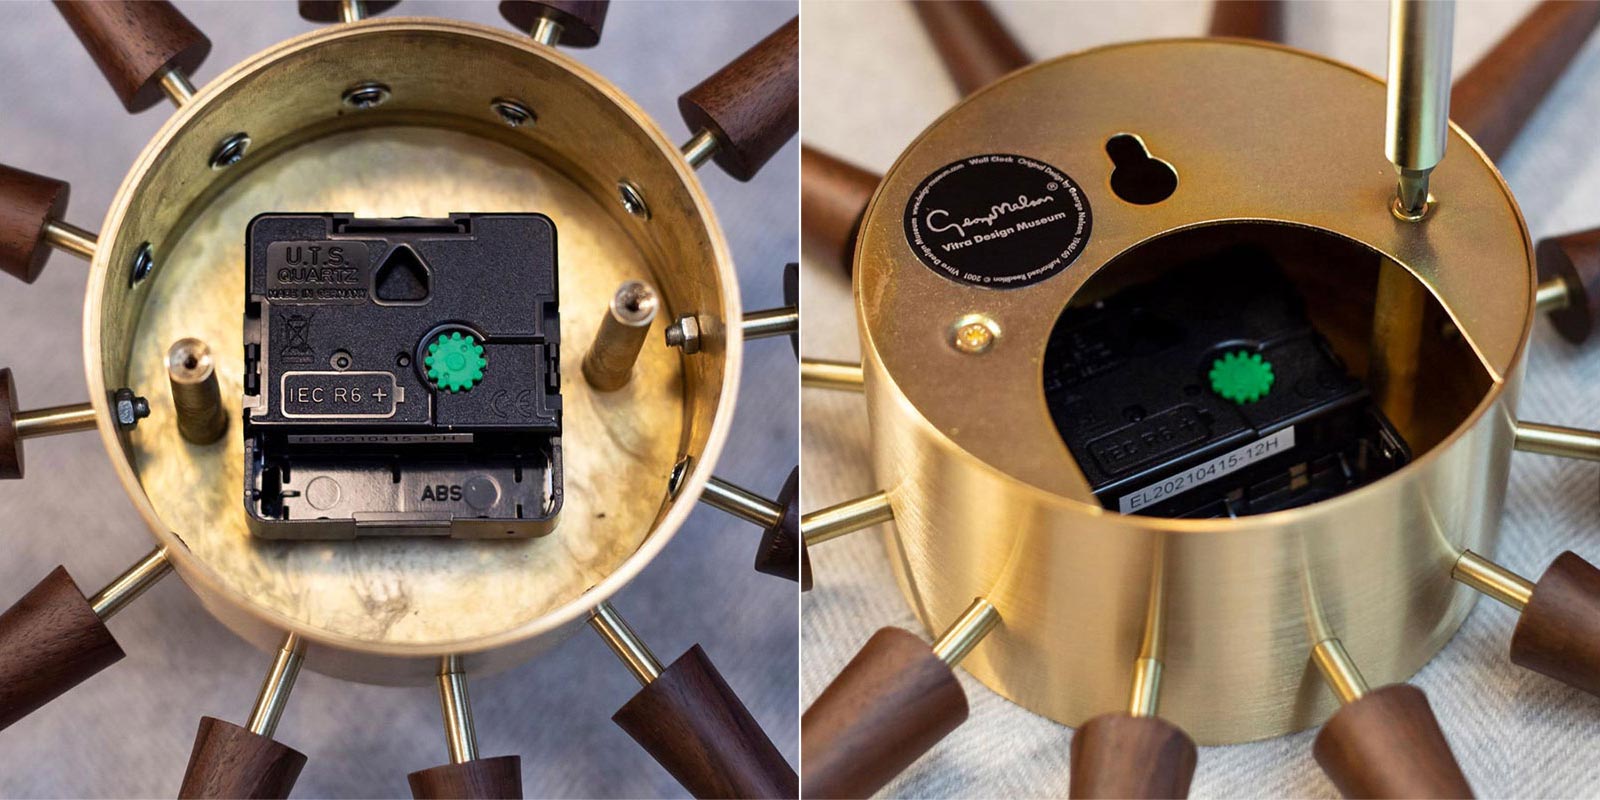
STEP 6 Remove the 2 screws holding the back cover plate with a Phillips screwdriver. Caution: if you are using a a poor quality screwdriver, it is easy to strip these screws. If this occurs, you'll need to drill them out. We have replacement screws should you need them. Set the plate and screws aside. Mark with a piece of tape or pencil where the bottom of the movement is oriented in the clock before removing it. This will help you align the new movement correctly so the battery compartment is accessible when you reattach the cover.
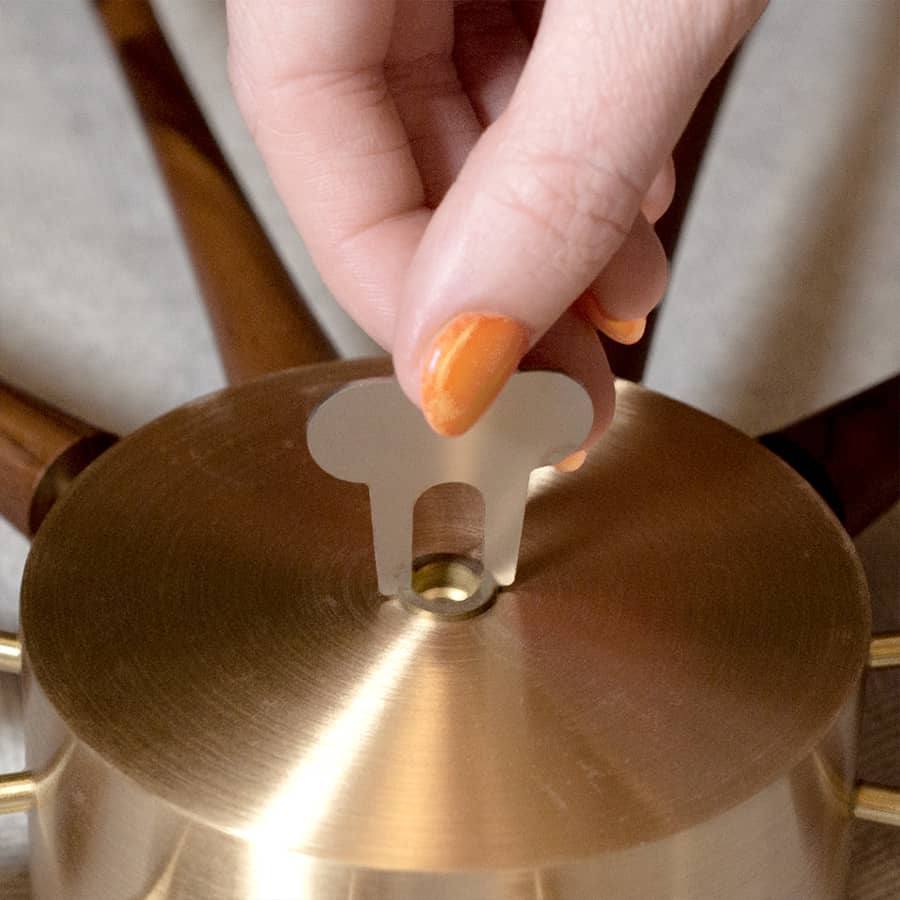
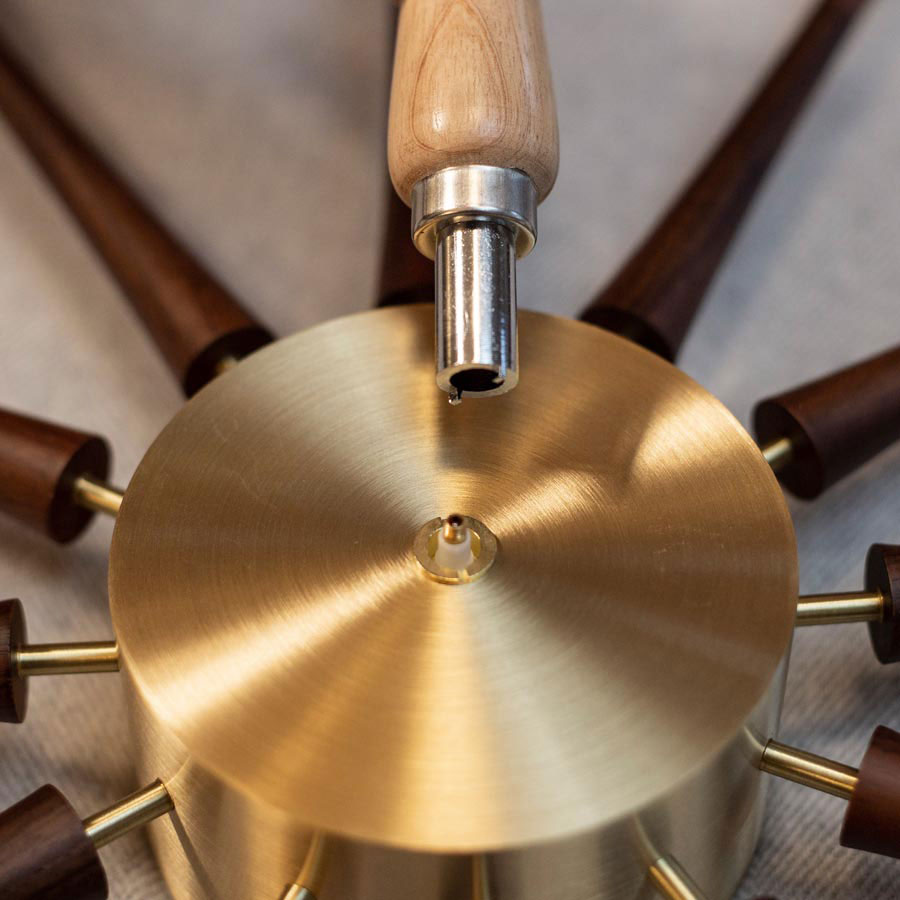
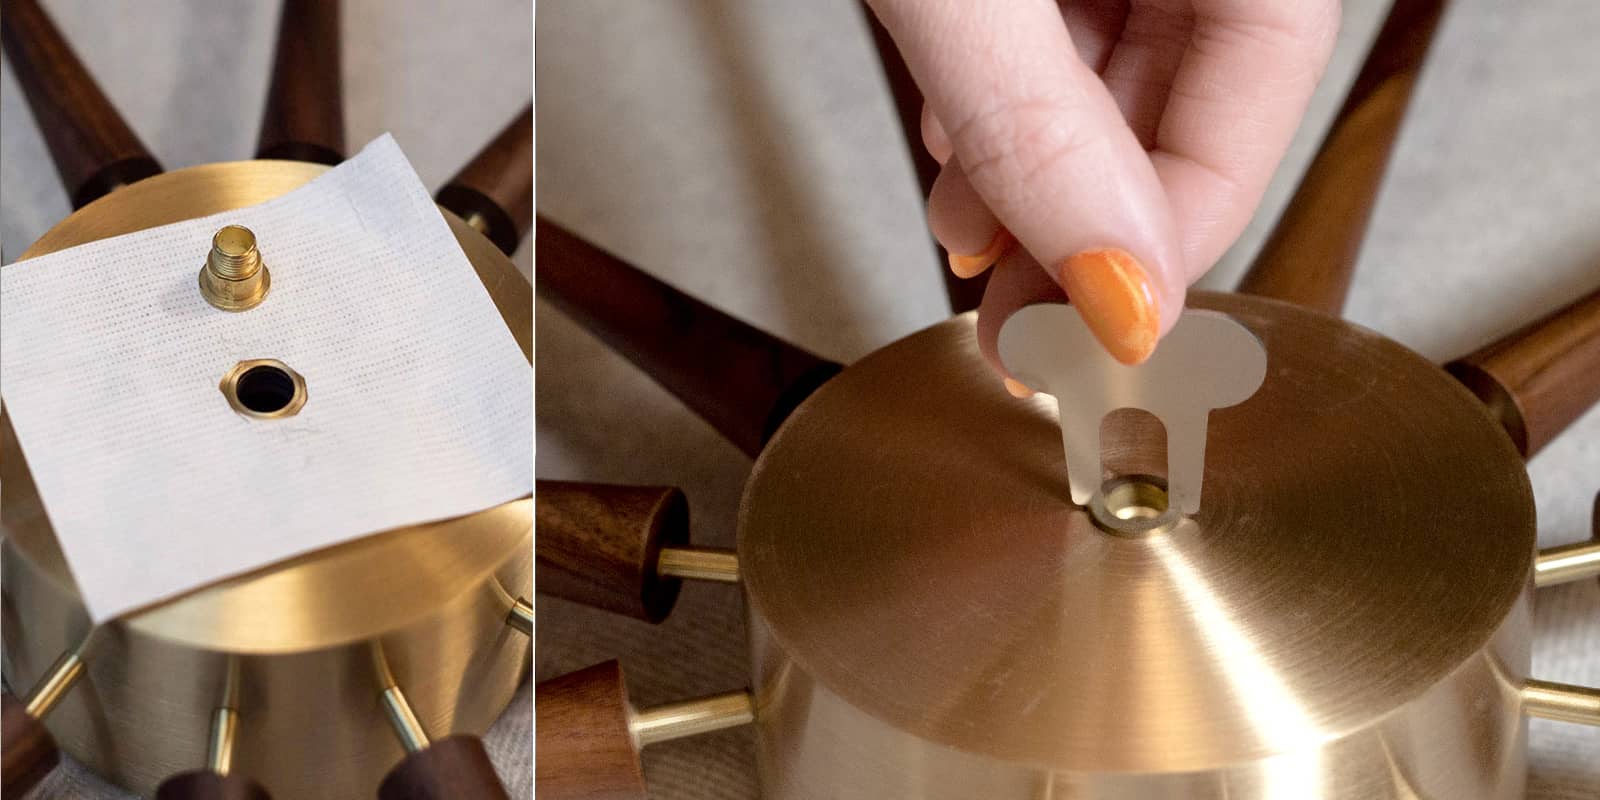
STEP 7 Carefully remove the fixing nut. The fixing nut attaches the movement to your clock. You may use a flathead screwdriver but use caution as it is easy to slip and damage the face of your clock. Shown is the fixing nut key we ship with our replacement movements designed specifically for this task. When removing the nut, press down into the slot and turn the nut counter-clockwise to loosen. As soon as it is loose enough, hand-loosen remainder until the movement comes off. You will need to hold the movement in place from the back to keep it from spinning with the nut. If the fixing nut is on extra tight, you can also try rotating the movement to loosen it, or a combination of both.
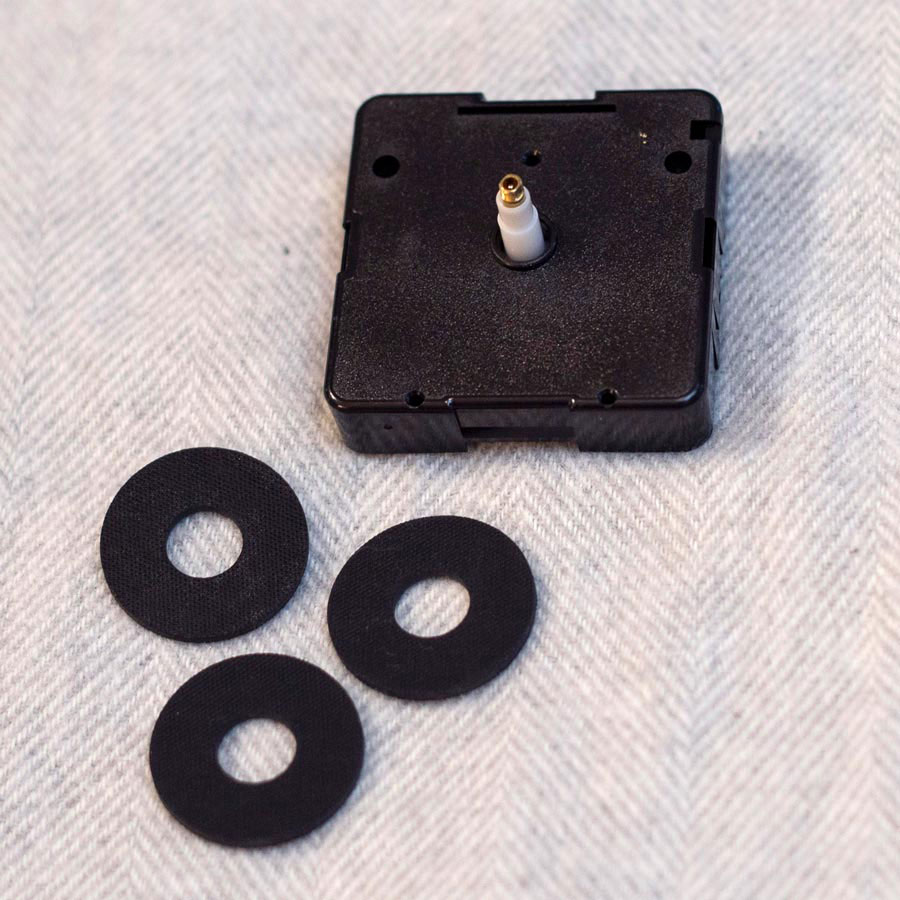

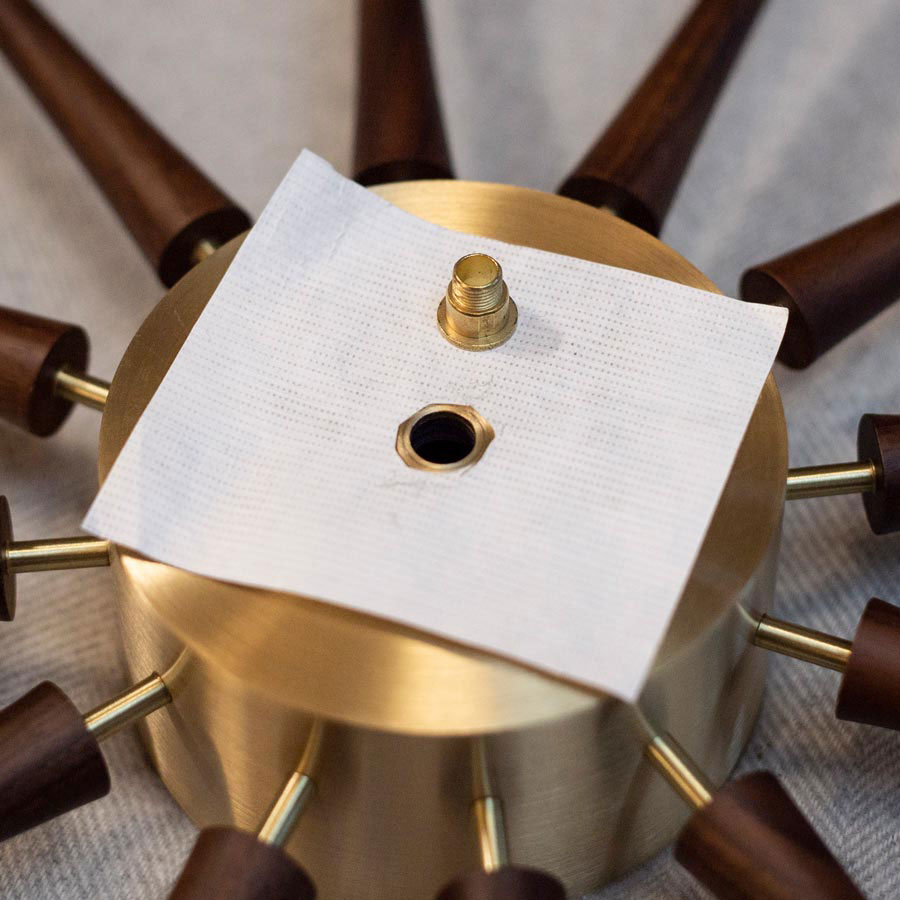
STEP 8 Remove the spacer washers from the old movement and place on the new movement. Unless there is damage to a washer, it is best to reuse them since they create the correct padding. Only replace if necessary.
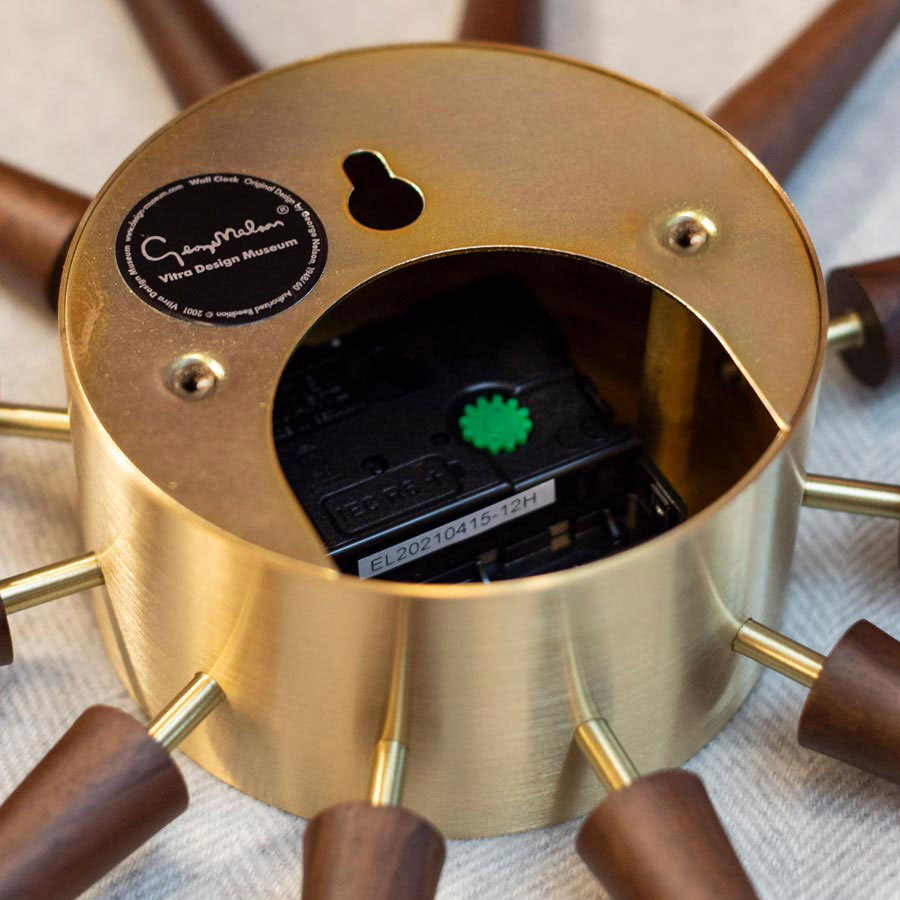
STEP 9 With the washers in place, slide the new movement into the clock. The battery opening must be positioned so that you can easily change the battery and access the green disc once the back place is reinstalled. Check by placing the back plate on, but do not reattach it yet.
STEP 10 Starting by hand-tightening clockwise, attach the movement to the clock with the fixing nut. Be mindful that the battery compartment remains in the correct position on the back as it may rotate with your turns. You may use one hand to tighten, and one hand to hold the movement in place from the back. Use our fixing nut key to tighten the rest of the way until the movement is firmly in place; do not overtighten. Use caution not to slip and scratch the front of the clock.
STEP 11 Screw the rear plate back in place. Make sure you can still access the battery compartment and green dial. If not, loosen the fixing nut enough to rotate the movement accordingly, and re-tighten.

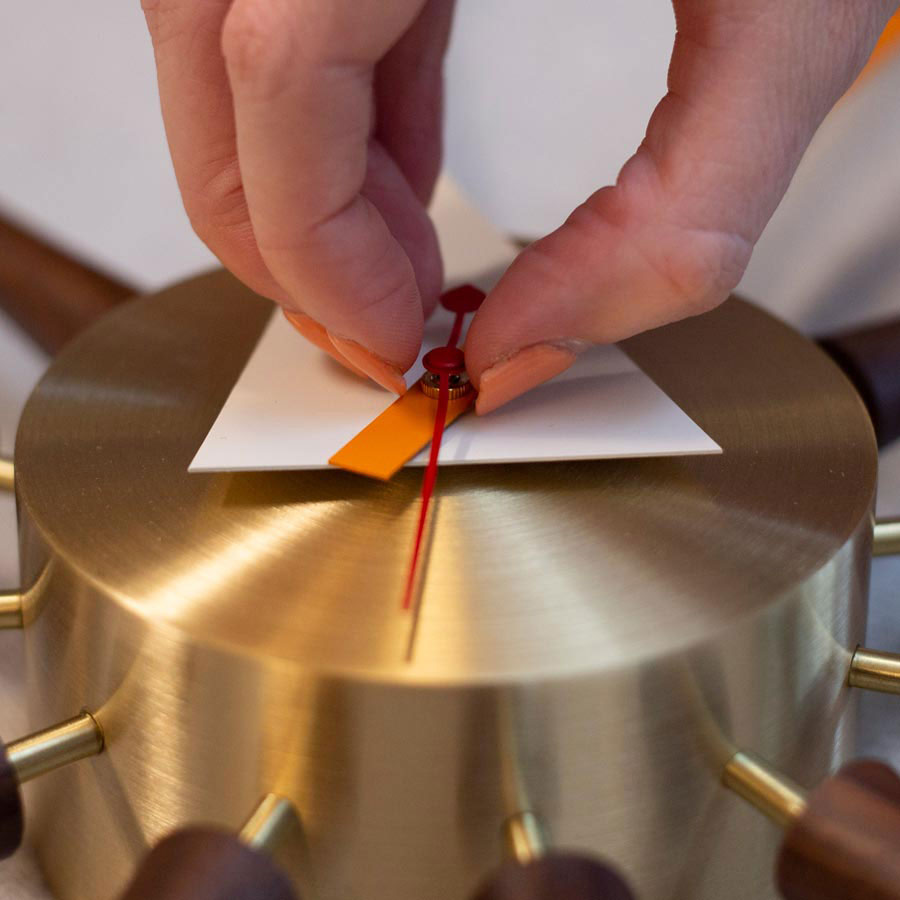
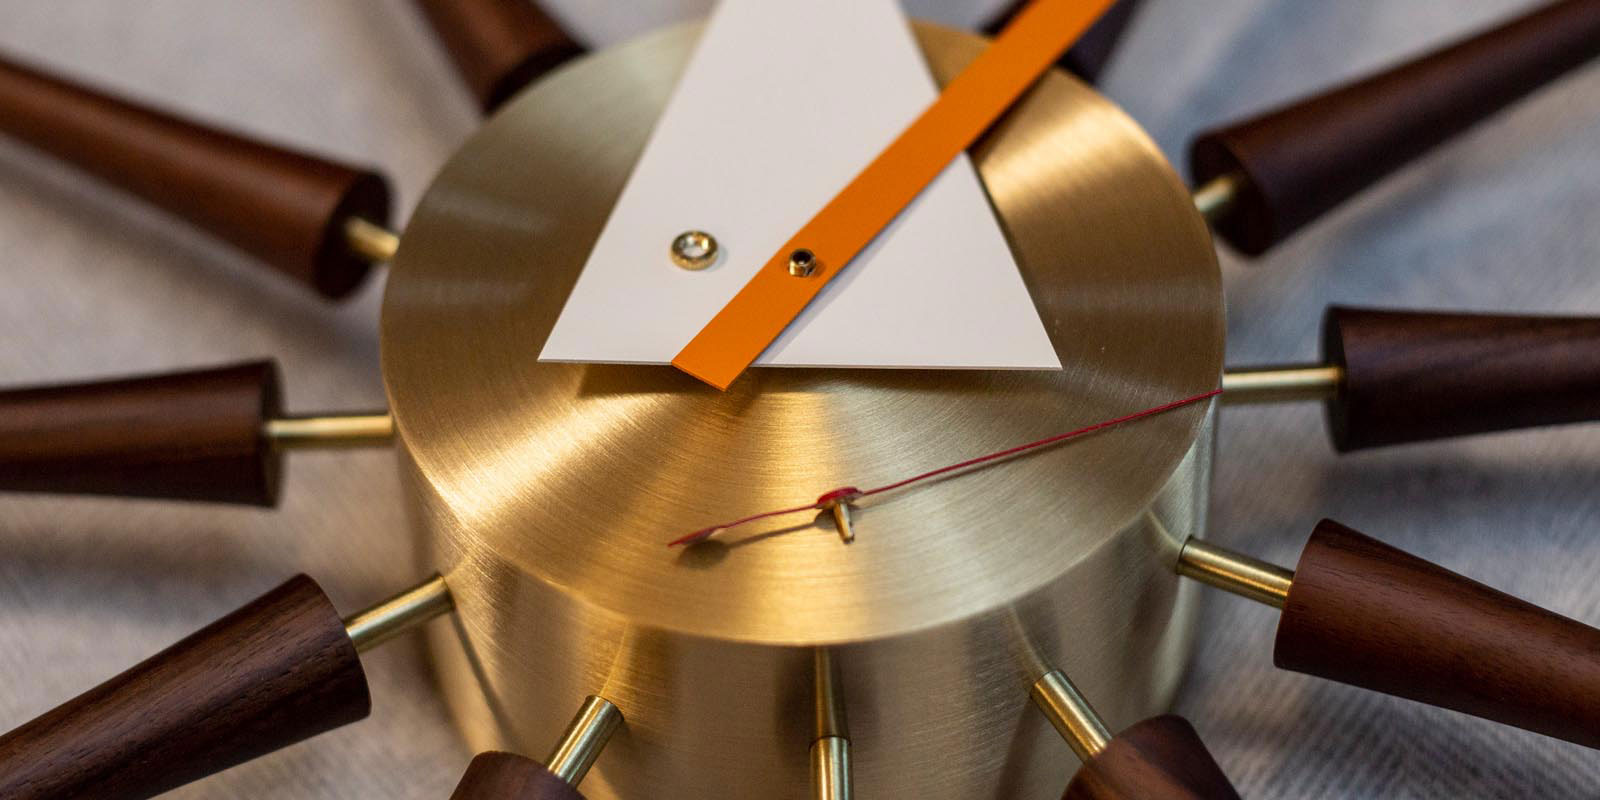
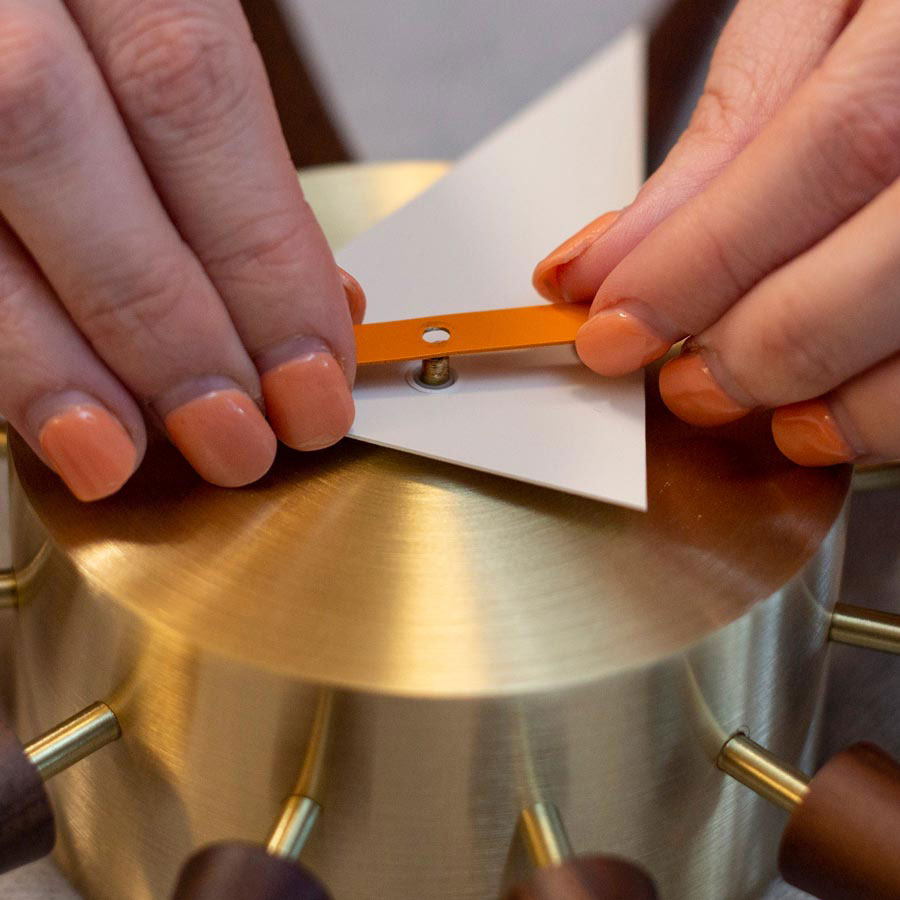
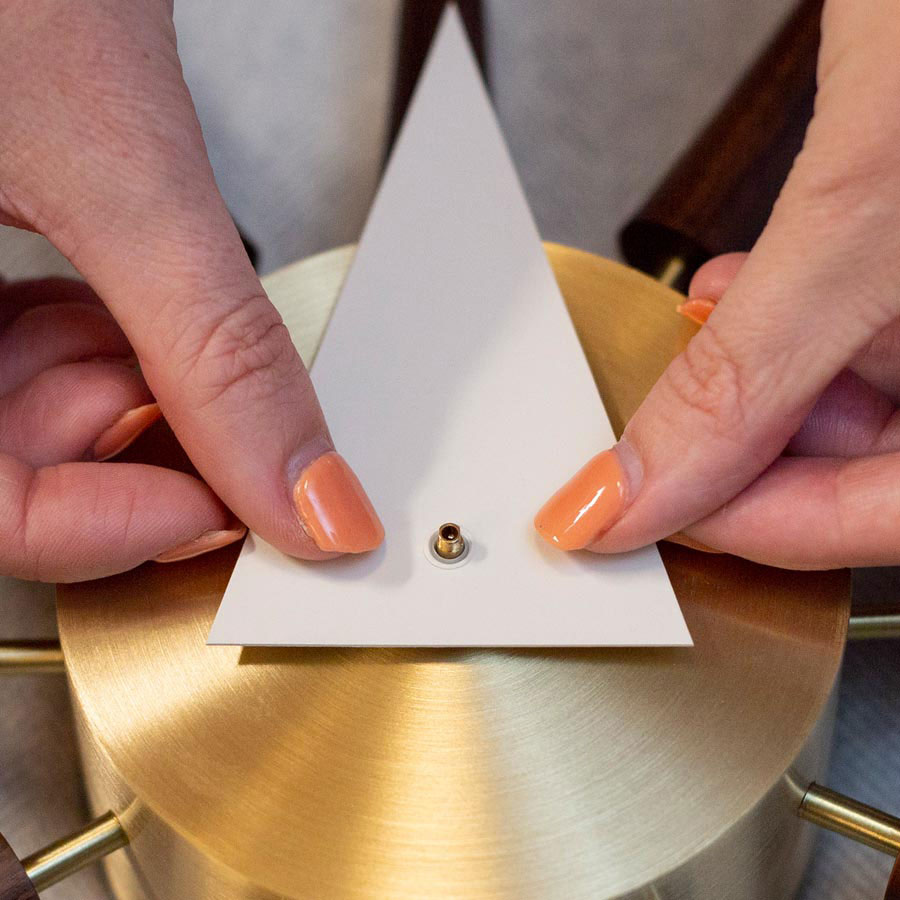
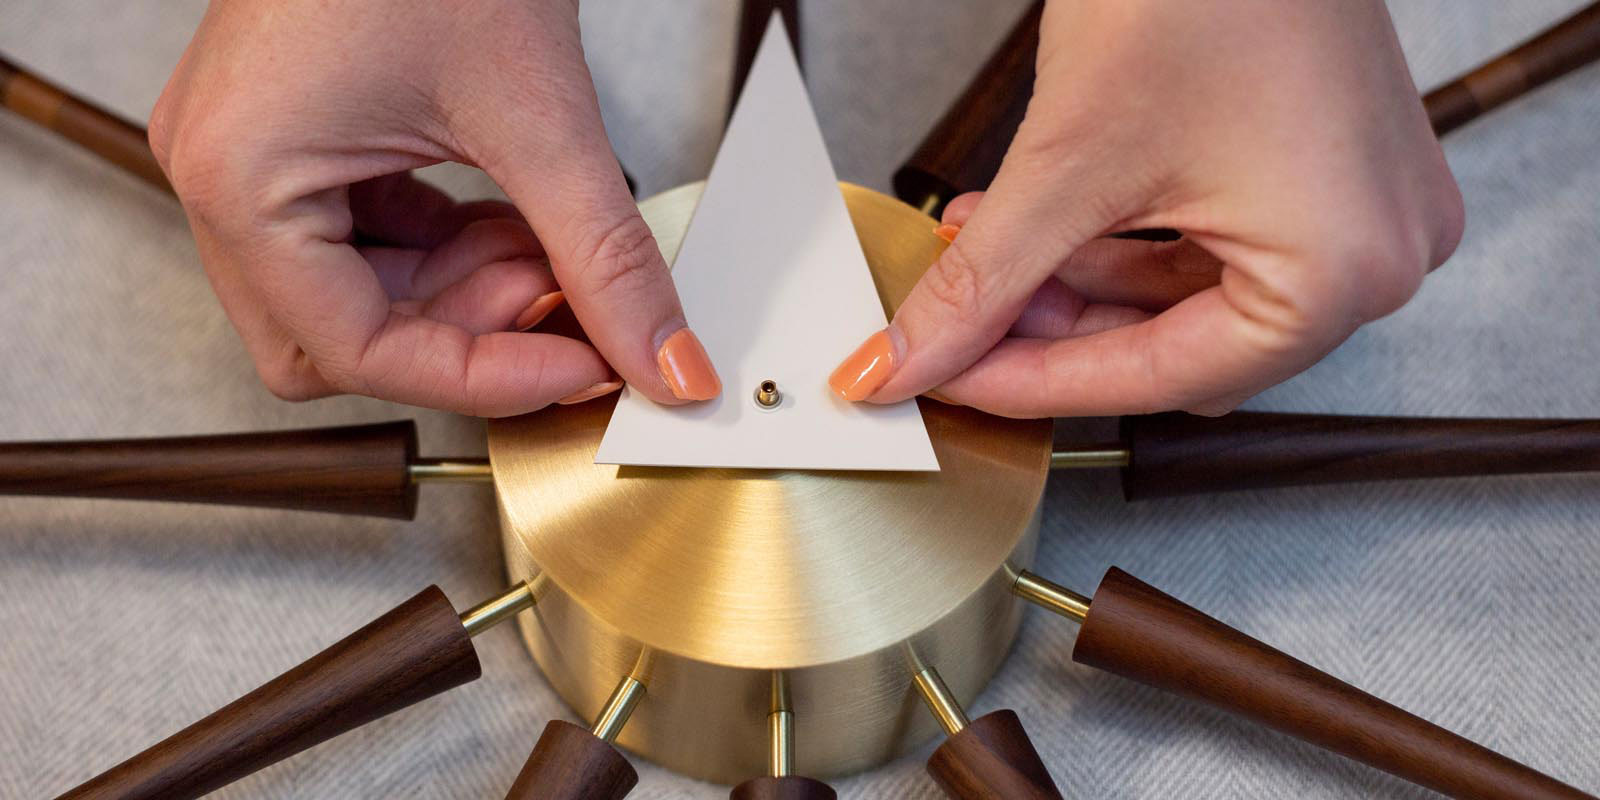
STEP 12 You will now synchronize the hour and minute hands. Carefully press the minute hand in place. Remember, the minute hand hole has two flat sides and only aligns and slides onto the movement shaft in one position. Once it drops in place, turn the green dial until the minute hand is pointing to 12. Remove the minute hand; be careful not to rotate the hand or dial from the 12 position. TIP: It may be difficult to tell which is the 12 position from the front. Look at the back of your clock and find the wall mount hole. The 12 position clock segment aligns with this hole.
STEP 13 Carefully slide the hour hand onto the shaft pointing it to the 12 position. Remember the flat side faces up. Apply gentle downward pressure until the hour hand is completely inserted into the movment shaft. Do not press further once it is firmly in place.
STEP 14 Re-insert the minute hand onto the shaft the same as Step 12. Both the hour and minute hands should be pointing to the 12 position. If they are not, remove both hands and repeat steps 12-13.
STEP 15 Screw the open nut (or closed nut if no second hand) on clockwise to hold the minute hand in place. It needs to be on tight or else it will loosen and eventually fall off. We recommend hand tightening as tight as possible. You may need to use needle nose pliers to help tighten. It is also possible to overtighten it with pliers. If you find your clock running slow a minute or so per day (and the battery is new and the hands aren't touching), the nut may need to be tighter or slightly loosened. Observe the minute hand around the 11 to 1 positions and 5 to 7 positions. If it is on too tightly, the minute hand may stick around 12 position. If it is on too loose, the minute hand may slip momentarily around the 6 position.
Bending Hands: Eye, Turbine, Fan Clocks
The hands on these clocks need to have extra bend added to clear the clock body. If you are replacing the hands with new ones, you will need to re-create the bend. Make sure when bending or reinstalling that the hands clear both the clock AND other hands during the full rotation. Failure to do so will cause the clock to stop or keep inaccurate time.

STEP 16 For models with a second hand: re-install the second hand by pressing it down into the center of the shaft.
STEP 17 Rotate the green dial clockwise to make sure the hands are clearing each other at all points on your clock. Inspect this at an angle. You may need to slightly bend the minute hand slightly upwards on both ends to for it to clear the hour hand and the second hand slightly upwards to clear the minute hand. Both hands are bendable for this reason. If the hands touch at any point, it will cause your clock to run slow. ALWAYS use the green dial to set the time. Changing the time by rotating the minute hand is the leading cause of the minute hand becoming stripped and can shorten the movement's longevity.
STEP 18 Insert a new AA battery. We recommend Energizer Ultimate Lithium which are leakproof and should last x4 longer than alkaline (do not use a rechargeable version). We also like Duracell alkaline. Angle the battery in as shown, pressing into the negative end (left side), and then press the positive side down. If you find your clock is running slow a few days later, replace the battery and check Step 17. If it still runs slow, check Step 15.
FINISHED. CONGRATULATIONS! If you found our guide helpful, it helps our business if you leave a review on Google, Facebook, or follow us on Instagram. If you have a suggestion to improve our knowledgebase from your experience, please email us.
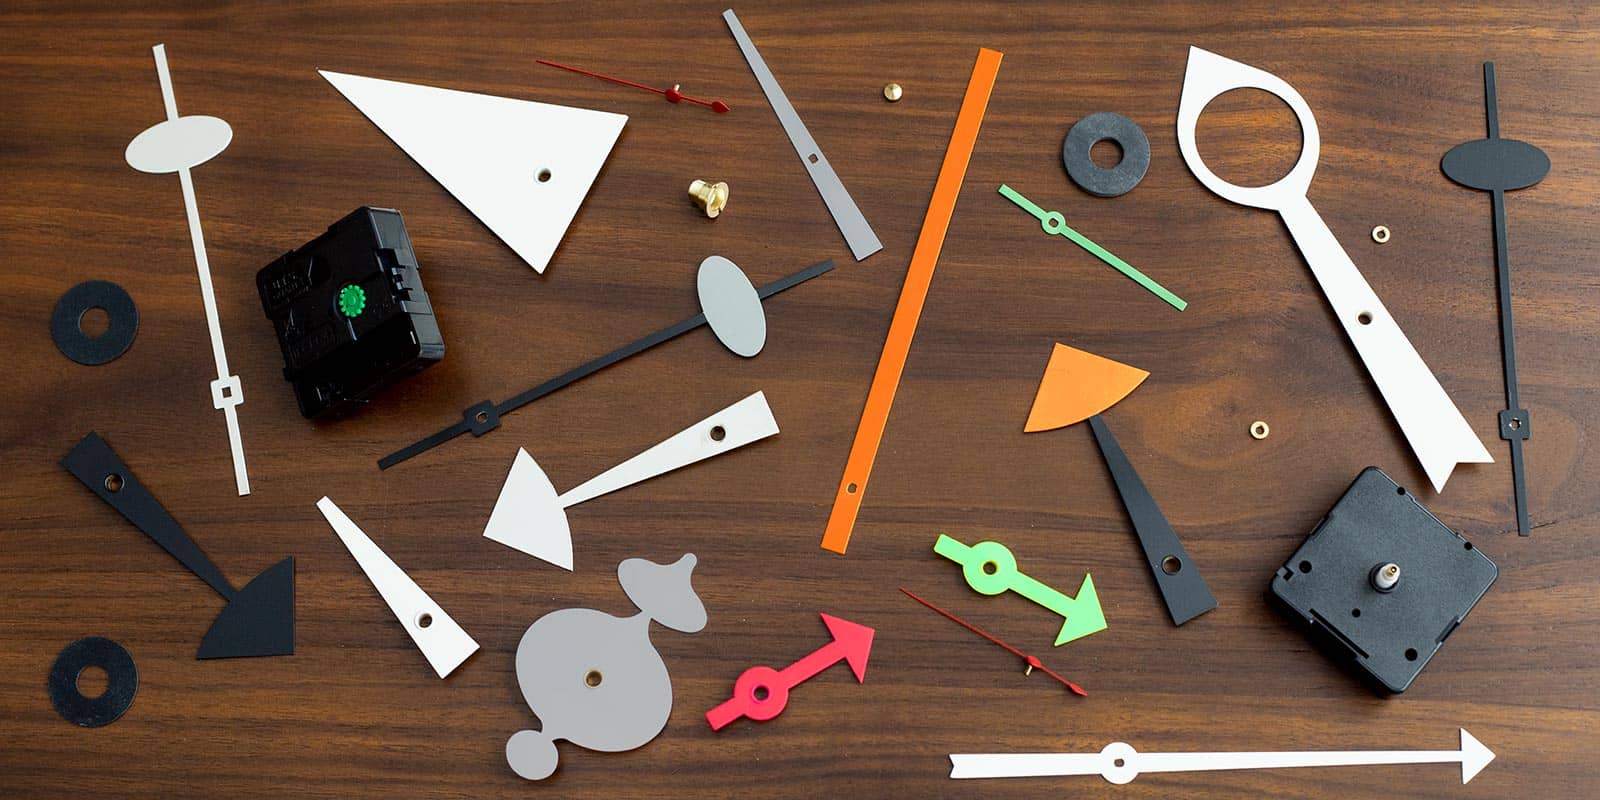 George Nelson Vitra produced replacement hands and German quartz movements
Replacement Quartz Movements
We sell German quartz movements for Vitra produced George Nelson clocks as a courtesy. We have a very limited number of Vitra produced replacement hands reserved for Clock Forward customers only. We apologize, but this is due to our very limited supply of replacement parts. Clock Forward does not service original electric George Nelson clocks, nor do we provide in-house repairs or guidance beyond this page.
Order Replacement Movement Kit
* Our tutorial references expertise from Vitra's mechanism replacement guide and our experience. All images are property of Clock Forward.