
This guide covers installation for all Dilù clock models. While designs vary, installation steps are similar. Contact us with any questions about your specific model—we're happy to help.
BEFORE YOU BEGIN: Unpack and Inspect
Carefully unpack your clock and inspect it before installing. If anything appears damaged, please contact us. It is easy for you to replace the hands and movement on-site.
STEP 1: Measure Your Clock and Wall Space
- Locate the mounting bracket and anchor bag in your package.
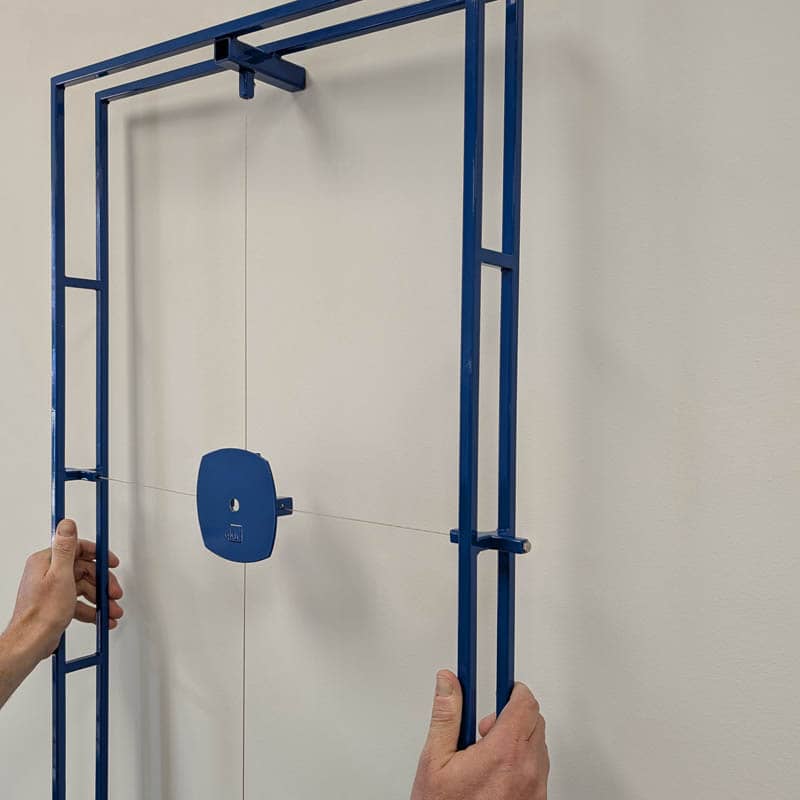
- Identify where the mounting bracket attaches to your clock body. This varies by model—it may be slightly above, flush with, or slightly below the top.
- It is typically easiest for one person to hold up the clock and let a second person (the decider) decide when it is in the right position. You can take turns to double check. Get this right before drilling.
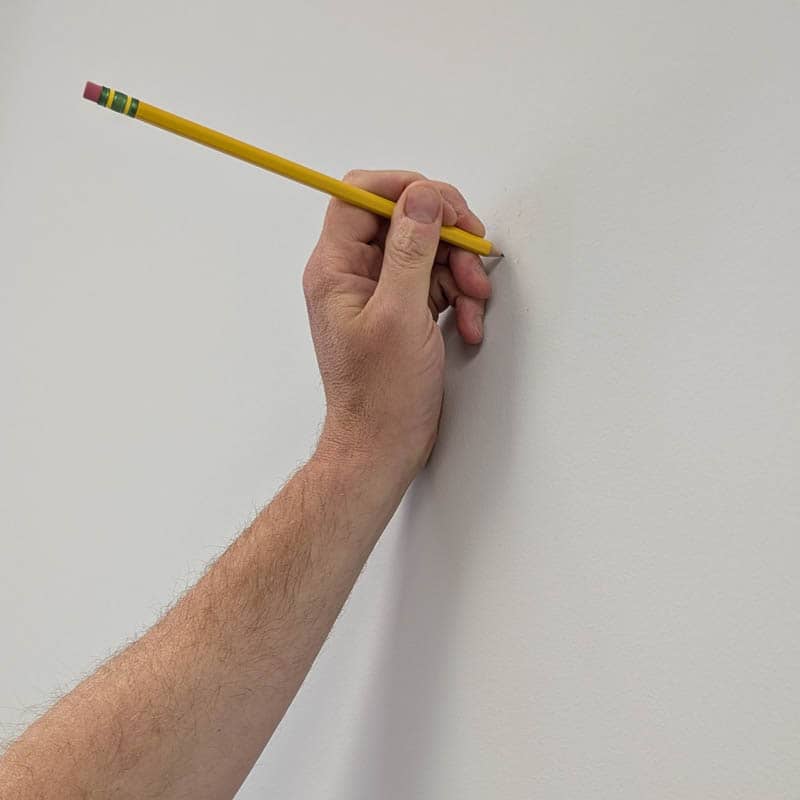
- Mark the wall (with painter's tape or light pencil) where the clock will attach to the bracket.
- If you need to measure more precisely to center, work off of this point.
- Important: Measure 2-3 times and drill once. You will drill a 1/2" hole and the minimalist design won't conceal your drilling mistakes.
STEP 2: Verify Wall Anchor Compatibility
Different wall types require different anchors:
- Hollow materials (drywall, plaster, wood panel)
- Thick concrete
- Wood studs
We included two snaptoggle anchors that are threaded to fit the metric M5 bolt. Contact us if you need a different anchor type.
STEP 3: Install the Wall Anchor
For Hollow Surfaces (SNAPTOGGLE® Toggle Bolt):
- Review the short how to install a Snaptoggle bolt video above.
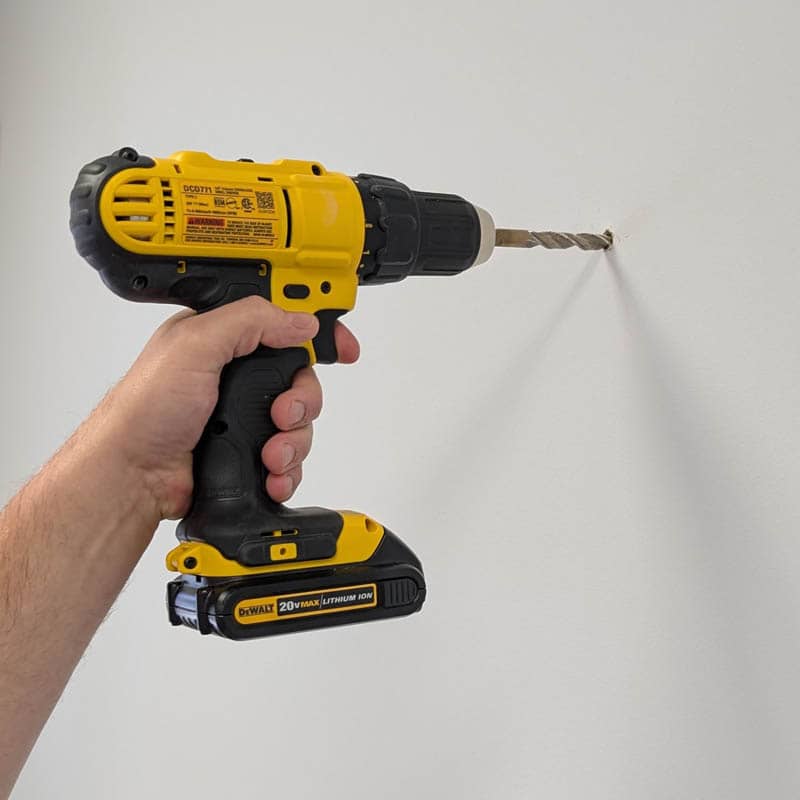
- Drill a ½" hole at your marked spot. We recommend starting with a ¼" pilot hole, then enlarge to ½". Makes sure this is as perpendicular (both horizontally and vertically) to the wall as possible.
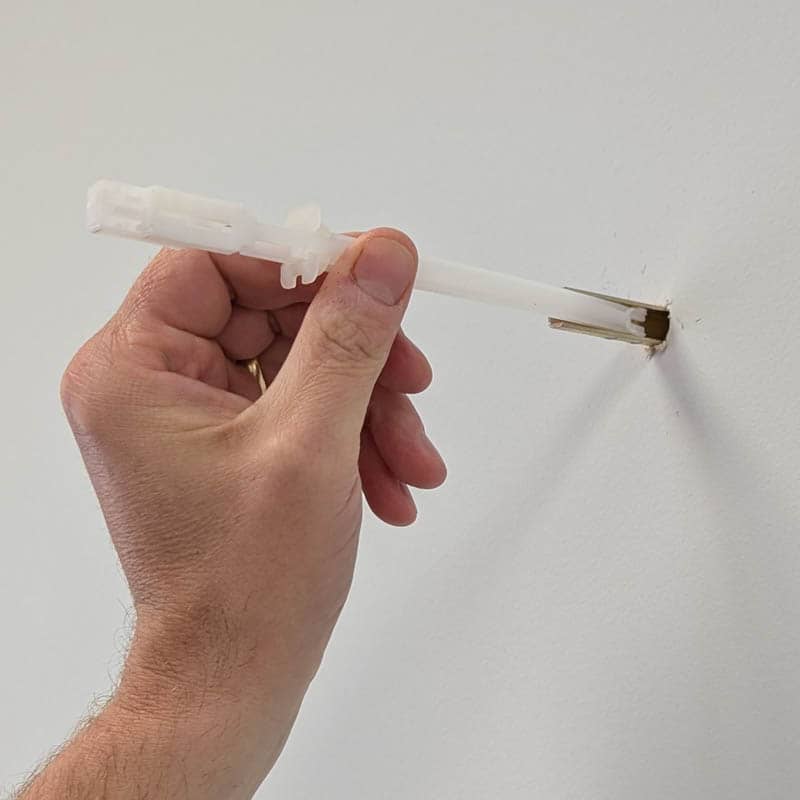
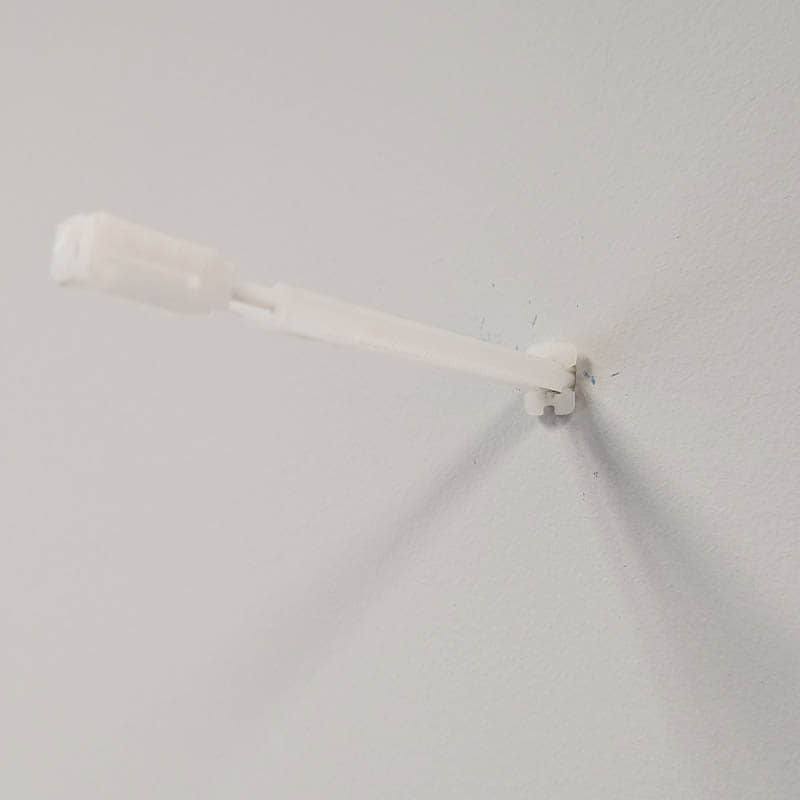
- Hold the metal toggle flush with plastic straps and slide into the hole in the wall.
- Pull the plastic end toward you until you feel the metal toggle firmly grip the opposite side of the wall.
- While maintaining the anchor grip tension, slide the plastic cap until it is as flush with the wall as possible. The anchor should now be firmly gripping both sides of the wall.
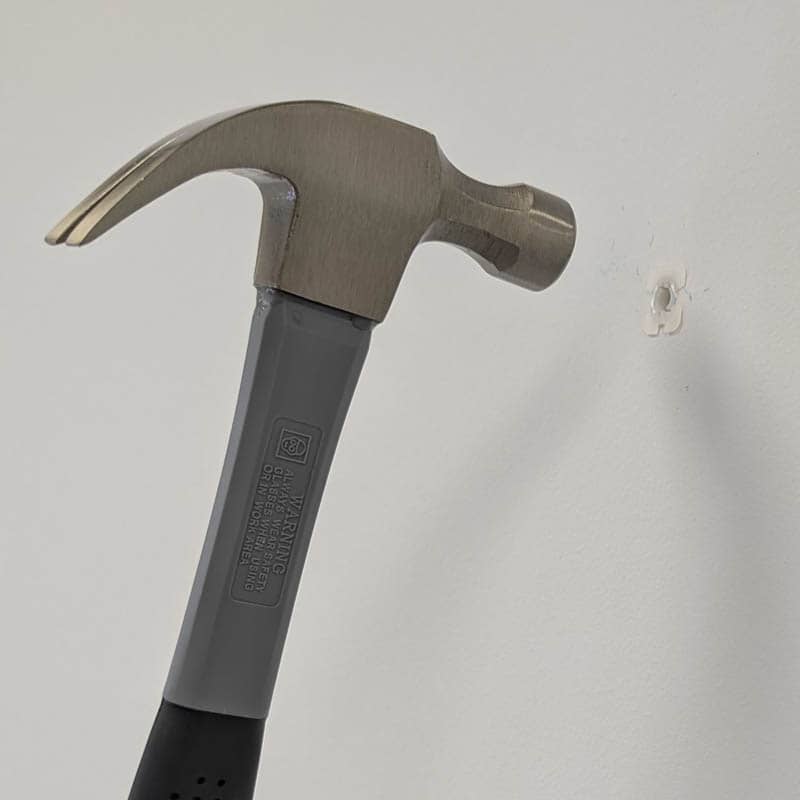
- Snap off the plastic straps by moving them side to side.
- Tap edges of the cap with a hammer if needed to ensure it's perfectly flush.
To permanently remove the anchor: Place a flat-head screwdriver in the anchor's center and hammer until it drops into the wall cavity. If you installed it too loosely, you can also pull the anchor outwards, snip the head off, and push it down into the wall. We included two Snaptoggles in case you make a mistake.
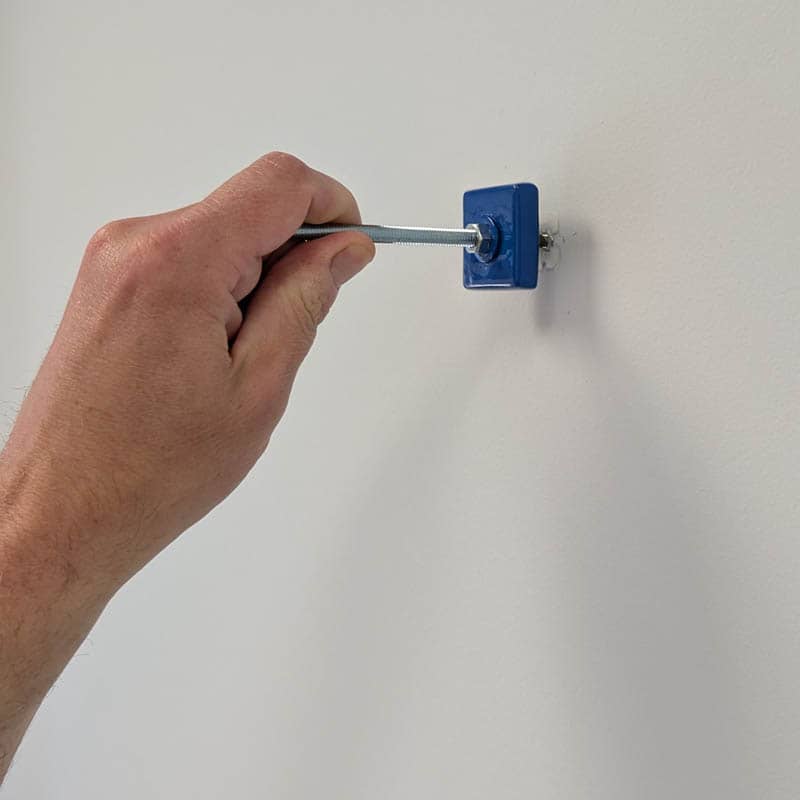
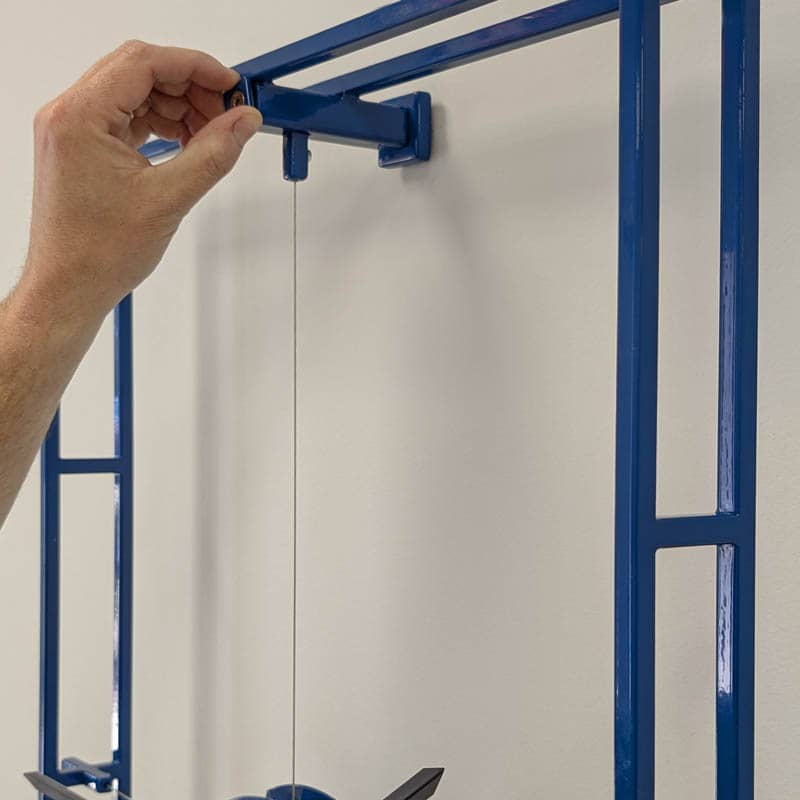
STEP 4: Install Mounting Bracket
Screw the mounting bracket into the anchor. A small gap between bracket and wall is acceptable—what matters is that the bracket is firmly secured. For brackets with vertical threads, ensure proper orientation on the final turn.
STEP 6: Set Time Before Installation
- Make sure the hands are installed properly. You may need to push the hour hand down into the movement depending on the packaging method.
- Ensure hands clear each other and the clock body when vertical (hands may touch when horizontal).
- Gently bend hands away from each other if needed—they're designed to be adjustable.
- Install the AA battery or pull the paper tab to engage the pre-installed battery. We included a leak-proof Lithium Energizer battery that should last much longer than a standard alkaline. Unlike alkaline, power will drop sharply at end of life, so there's no need to replace it until absolutely necessary. This will either require removing a magnetic backplate or unscrewing the protective case.
- Set time using the green adjustment dial on the back—rotate so hands move clockwise (counterclockwise is acceptable for moving the hands back an hour or two). Once it is installed, you can change the time by gently moving the minute hand only.
STEP 7: Install the Clock
Carefully attach the clock to the mounting bracket.
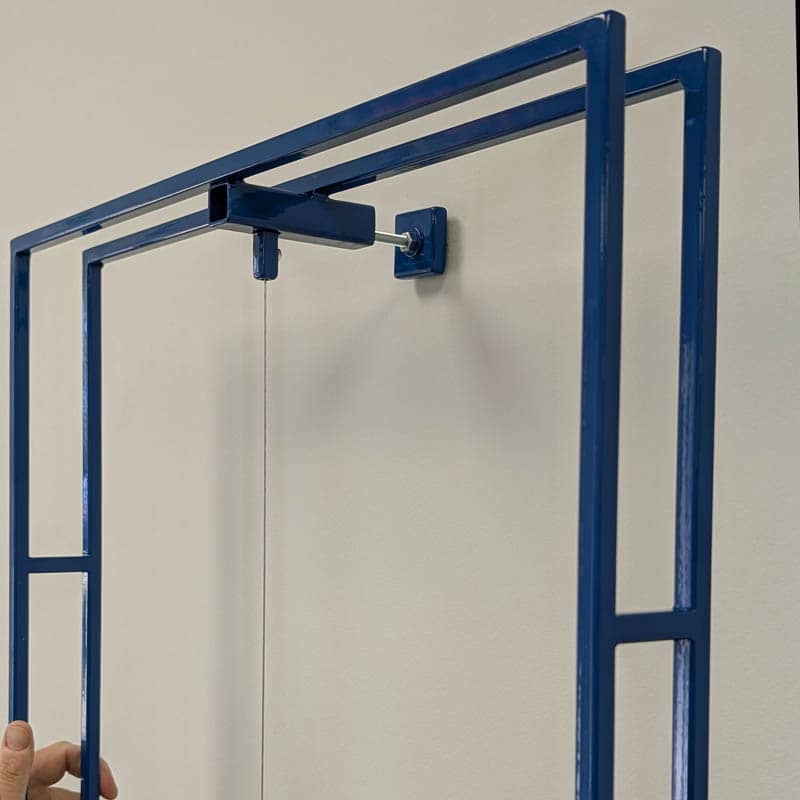
STEP 8: Secure the Clock
Secure the clock using the included finishing bolt. This varies by model. A metric allen wrench is included when necessary. Check the clock is level and adjust. If the three-position comes out a little more than the nine-position from the wall on some models, it may require a little force to straighten the clock on the bracket. Perform this gently in small increments.
Maintenance
- Time Setting: Once mounted, adjust the time by moving the minute hand. For fall back, it's ok to move the minute hand backwards and hour.
- Battery Replacement: You should be able to perform this on most models without removing it from the wall. Use one hand to secure the clock so you are not pulling the clock away from the bracket. If it requires you removing the clock, it's a good opportunity to dust it.
- Recommended Battery: Energizer Lithium AA non-rechargeable variety (leak-proof, longer lasting, less changes)
- Important: Replace dead alkaline batteries promptly to prevent leakage and movement damage.
Support
Email us or call 1-704-981-0636 with any questions about your Dilù clock.